
There are many dungeons for the player to explore in Diablo Immortal, each with its challenges, bosses, and rewards to obtain. One of these is the Tomb of Fahir dungeon, and if you plan on venturing through this dungeon or are struggling to do so, then this guide is for you.
We will be covering everything you need to know about the Tomb of Fahir, including where to find its entrance location, the level requirements to enter it, and the unique Set of Items you can collect if you beat it.
Tomb of Fahir Location and Required Level in Diablo Immortal
The required level for the Tomb of Fahir is 28, and players will only be able to unlock it during the Shassar Seas zone questline. Once completing Tabri's quest, she will open up the path to the Library of Zoltun Kulle.
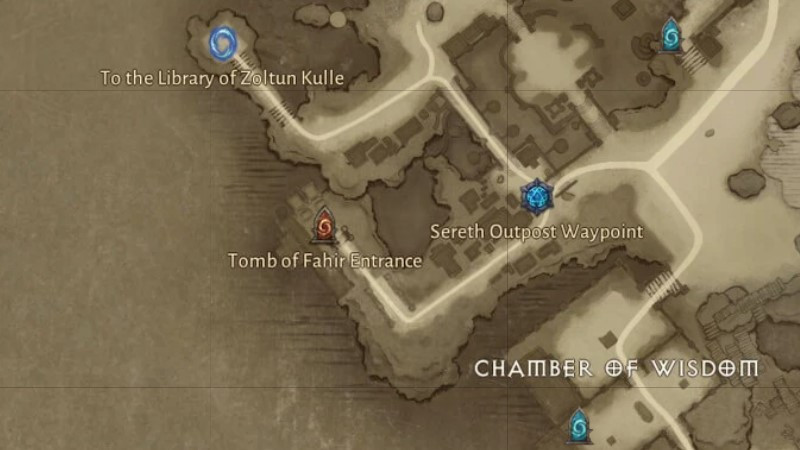
Once opened, players can find the entrance to the Tomb of Fahir near the Sereth Outpost Waypoint.
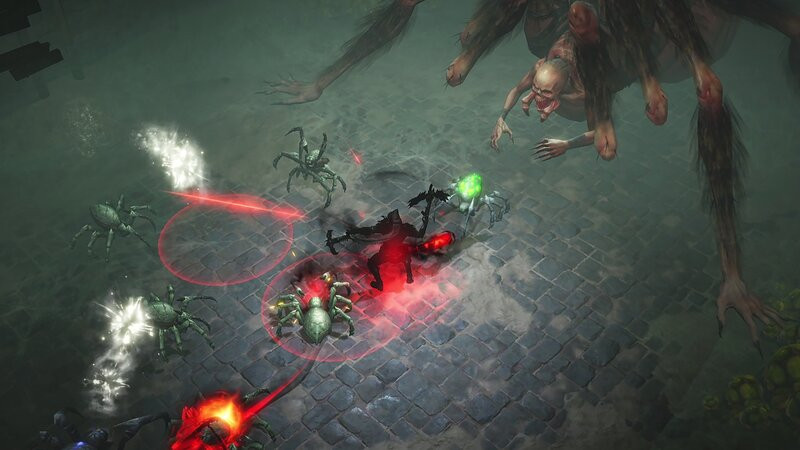
Tomb of Fahir Bosses in Diablo Immortal
The dungeon first throws two smaller, mini-bosses at you that are fairly easy to defeat. After which you will battle with King Fahir, then move on to the final boss, Segethis, the Clusterflesh. The first two mini-bosses are relatively similar, called Icon of Rebirth and Icon of Souls.
To defeat the Icon of Rebirth, players need to take down the Lacuni Slasher, Lacuni Huntress and Hollow One that it summons. And deal damage to the boss itself, for this we recommend AOE (Area of Effect) attacks that you can perform by drawing the enemies it spawns to the boss and then attacking, dealing damage to both the spawned enemies and the boss.
The Icon of Souls summons Spiderling, Toxic Lurker, Broodmother, Skeletal Archer, and Skeletal Warrior, additionally, he also projects a blue laser bean after slamming his staff on the ground, you can avoid this by just running away when he telegraphs the attack. To defeat him follow the same steps for the Icon of Rebirth using AOE attacks.
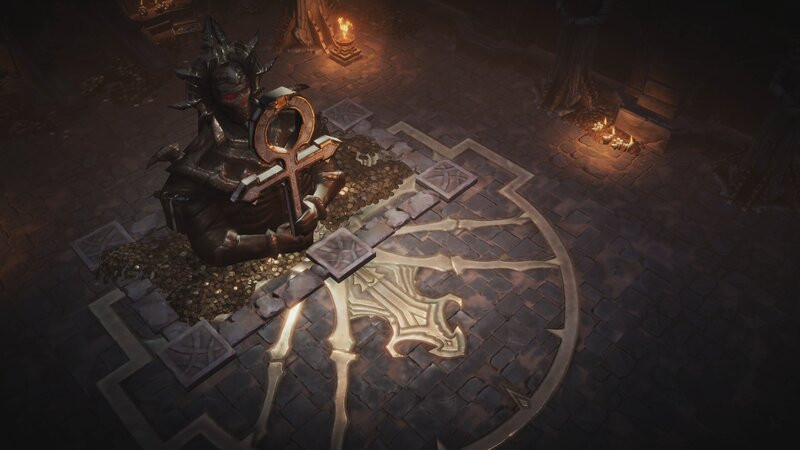
After defeating them, you will move towards the back of the dungeon to take on King Fahir, a moderately powerful boss, but not impossible to defeat. He has one worrisome move that causes knockback damage, but there is a way to deal with it.
By standing in front of the pillar when he does the knockback attack, you can tank the damage but can counter and deal even more damage to the boss after doing so. Be sure to keep plenty of heals on hand to replenish your health.
He will also spawn mummies with a greenish glow that will explode after some time, so be sure to avoid them at all costs. He will also slam his staff on the ground, indicating that he's going to throw bombs at the player, so just strafe around him and avoid the bombs as they're thrown.
Lastly, when he reaches the last phases of his health, he will use an AOE attack, telegraphed by a circle on the ground. Avoid this at all costs as it will pull you towards him and deal massive knockback damage if you're caught in it, keep following these steps and countering until the boss has fallen.
After King Fahir, you will head down to the depths of the dungeon via an elevator, where a few enemies will spawn to attack you, but they can be easily disposed of. Eventually, a Tomb Borer will spawn on the elevator and spawn more monsters, dispatch the Tomb Borer first, to avoid him summoning more monsters and getting overwhelmed.
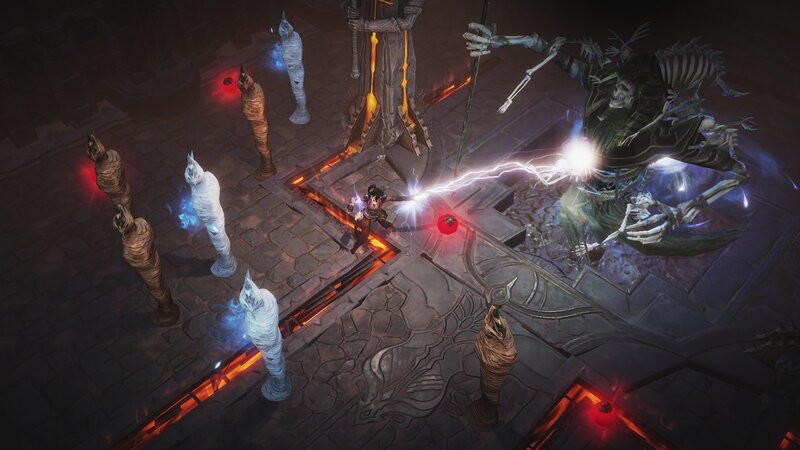
Finally, you will reach the last area of the dungeon and face Segethis, the Clusterflesh. Defeating him can be simple, but there are a few things to keep in mind when taking him on.
When the fight starts, stay moving and avoid the venom orbs that it spits out, or you will incur poison damage for the duration of the fight. He will also do a swipe attack that can be avoided by moving out of the way as it causes heavy knockback damage.
Segethis will also create a circle around the player, once this happens, be ready to run, as if you get caught, Segethis will pull you in close to deal significant damage. Avoid all his attacks and deal damage to his back legs until his head lowers to deal maximum damage until he falls.
Tomb of Fahir Set Items
As with most dungeons in the game, the first time clearing it will be part of the story, after which players can choose to re-do the dungeon at a higher difficulty or higher level for more rewards. Below are the Set Items that will drop when completing the dungeon at the different Hell difficulties.
- Braided Serpent of Shal'baas (Ring) Hell 2
- Exemplar's Urge(waist) Hell 1
- Issatar Undone(ring) Hell 2
- Mountebank's Bravado(waist) Hell 1
- Mountebank's Flourish(amulet) Hell 2
- Open Gut(waist) Hell 2
- Shepherd and Beastmaster(gloves) hell 1
- Storm-Tack of Shal'baas (waist) Hell 1
- The Tyrant(boots) Hell 2
- Whipcrack(waist) Hell 1
For more news on the game and the iconic ARPG franchise, check out our sections dedicated to Diablo 3, Diablo Immortal, and Diablo 4. Get the latest guides & tutorials for your favorite Diablo title below.
Diablo Immortal Guides - Character Server Transfer | Next Hungering Moon | Hell Difficulty Levels | Combat Rating (CR) | Recruit A Friend | Redeem Codes | Next Season | Fractured Plane Event | Vote Kick Feature | Next Helliquary Boss | XP Bug Fix | Class Change | Max Level Cost | Lost Pages | Legacy of the Horadrim | Player vs. Player (PVP) | Set Items | Resonance | Potency | Level Progression | Trading | Crusader Build | Barbarian Build | Monk Build | Necromancer Build | Marketplace | Zone Events
Diablo 2 Resurrected Guides - Ladder Reset | Magic Find Bonus Event | Holy Grail Challenge | Underground Passage Location | Character Deleted Fix | Black Screen Freezes Fix | Unable To Start Fix | Best Assassin Build | Best Barbarian Build | Best Amazon Build | Secret Cow Level | Runewords | Attacks Missing | Horadric Cube | Cairn Stones | Reset Skills & Stats |
Diablo 3 Guides - Zoltun Kulle Adventure Mode | Puzzle Ring | Ramaladni's Gift | Death's Breath | Next Season | Kanai's Cube | Sanctified Powers |
Diablo 4 Guides -Cross-Play & Cross-Progression | Dungeons | Game Pass | Endgame Beta | Book of Lorath
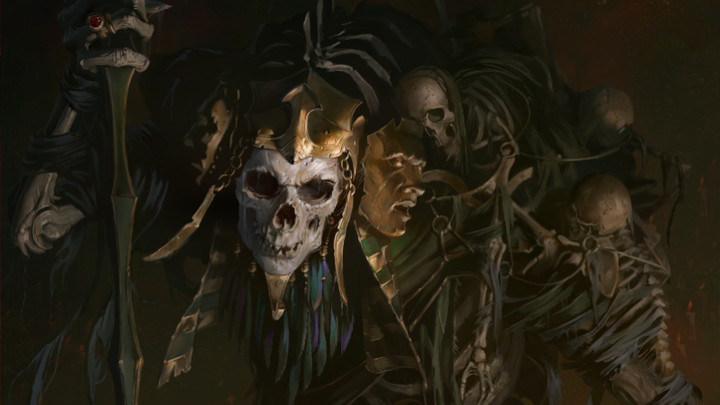
Featured image courtesy of Blizzard Entertainment.
Check out our video below, discussing Diablo Immortal's story and how the game fits into the franchise's timeline.
For more news on the game and the iconic ARPG franchise, check out our sections dedicated to Diablo 3, Diablo Immortal, and Diablo 4. Get the latest guides & tutorials for your favorite Diablo title below.
Diablo Immortal Guides - Character Server Transfer | Next Hungering Moon | Hell Difficulty Levels | Combat Rating (CR) | Recruit A Friend | Redeem Codes | Next Season | Fractured Plane Event | Vote Kick Feature | Next Helliquary Boss | XP Bug Fix | Class Change | Max Level Cost | Lost Pages | Legacy of the Horadrim | Player vs. Player (PVP) | Set Items | Resonance | Potency | Level Progression | Trading | Crusader Build | Barbarian Build | Monk Build | Necromancer Build | Marketplace | Zone Events
Diablo 2 Resurrected Guides - Ladder Reset | Magic Find Bonus Event | Holy Grail Challenge | Underground Passage Location | Character Deleted Fix | Black Screen Freezes Fix | Unable To Start Fix | Best Assassin Build | Best Barbarian Build | Best Amazon Build | Secret Cow Level | Runewords | Attacks Missing | Horadric Cube | Cairn Stones | Reset Skills & Stats |
Diablo 3 Guides - Zoltun Kulle Adventure Mode | Puzzle Ring | Ramaladni's Gift | Death's Breath | Next Season | Kanai's Cube | Sanctified Powers |
Diablo 4 Guides - Cross-Play & Cross-Progression | Dungeons | Game Pass | Endgame Beta | Book of Lorath