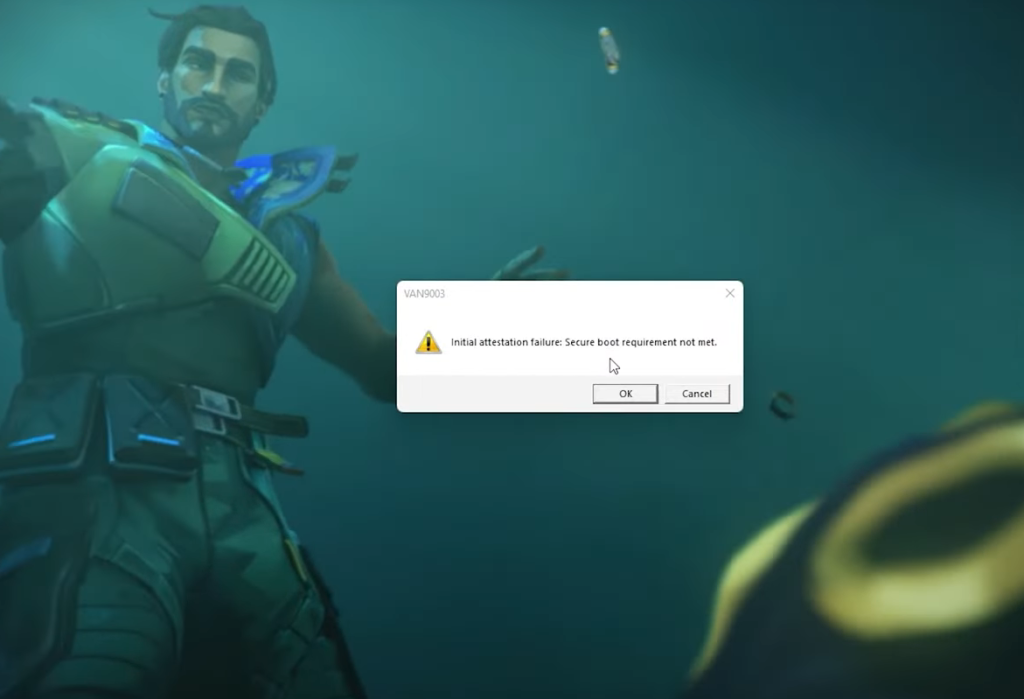
When trying to play Valorant, you may encounter a bunch of different errors that might be a result of something wrong happening with the game or on your side. One of them is the Initial Attestation Failure: Secure Boot Requirement Not Met and it appears for Windows 11 users who have Secure Boot and TPM 2.0 on their system.
In order to run Valorant on Windows 11, Vanguard needs Trusted Platform Module (TPM) and Secure Boot in order to run the game securely and if any one of them is not enabled, Vanguard will prevent the game from getting started and “Initial Attestation Failure: Secure Boot Requirement Not Met” might appear. Here’s how you can fix it.
Valorant: Initial Attestation Failure Error Fix
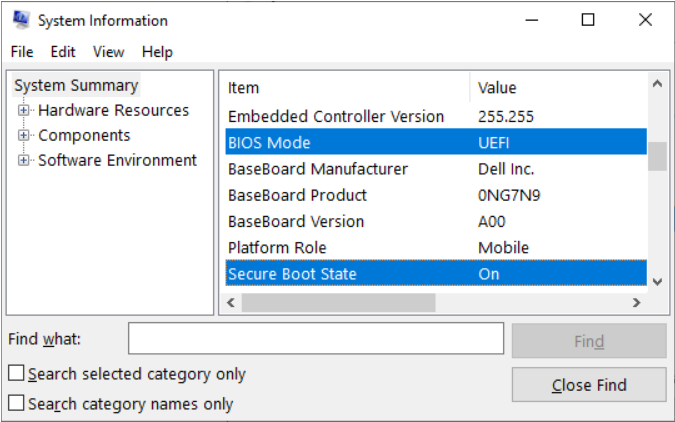
First of all, you will have to check if your system supports Secure Boot and TPM 2.0 or not. You can check the Secure Boot support status by pressing the Window key, typing msinfo32, and then pressing Enter. The System Information window will then appear and there scroll down the right side and find the BIOS Mode option. If it says unsupported, then you should switch back to Windows 10 or you won’t be able to play Valorant on your PC.
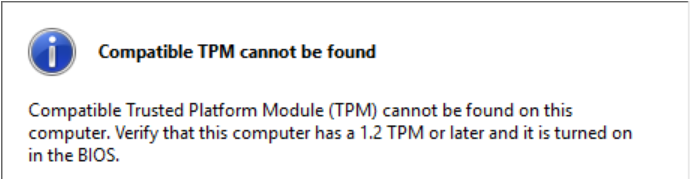
In order to check TPM 2.0 support, press Windows key on your keyboard and then type tpm.msc. Press Enter and if TPM 2.0 is unsupported or not enabled, you will get a dialogue box saying “Compatible TPM cannot be found.”
However, if your PC does support both of them, you will need to enable them by going to Settings > Update & Security > Recovery and select Restart now under Advanced startup. A blue colored screen will appear and you need to select Troubleshoot > Advanced options > UEFI Firmware Settings > Restart to make changes.
Now, you will need to switch the PC boot mode from one enabled as “Legacy” BIOS (also known as “CSM” Mode) to UEFI/BIOS (Unified Extensible Firmware Interface). In some cases, there are options to enable both UEFI and Legacy/CSM. If so, you will need to choose for UEFI to be the first or only option.
If you want more detailed information, you can check Dell, Lenovo, and HP‘s official websites based on the system your are using.