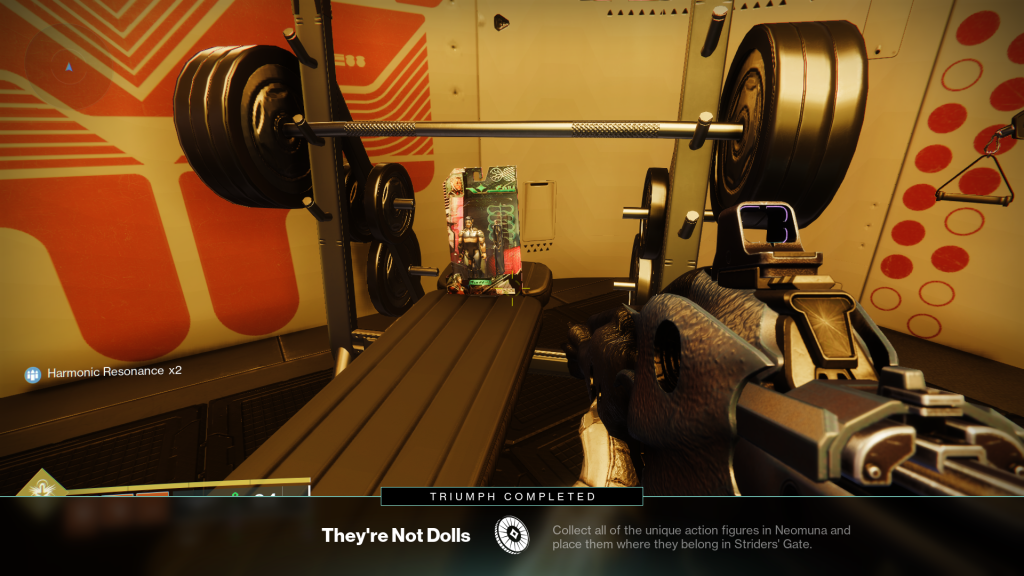
While Europa has Penguins and the Throne World has Moths, Neomuna has Action Figures of the legendary Cloud Striders to find. These Action Figures will be appearing over the course of the next several weeks and we will be updating this guide to help you find every Action Figure location in Neomuna for the They’re Not Dolls triumph in Destiny 2.
There are 9 figures scattered across the map and hidden extremely well, but finding them is only half the battle. Once you’ve collected your very own Cloud Strider Action Figure, you must take it to Nimbus’ Apartment near the Watch Tower in the Strider’s Gate zone of the Neomuna map. Here, you can put them on display like any proud doll – I mean, Action Figure – collector would. Here are all of the Action Figure locations on Neomuna, broken down week by week.
Table of Contents
Nimbus’ Apartment Map Location on Neomuna

Where To Put The Action Figures In Neomuna
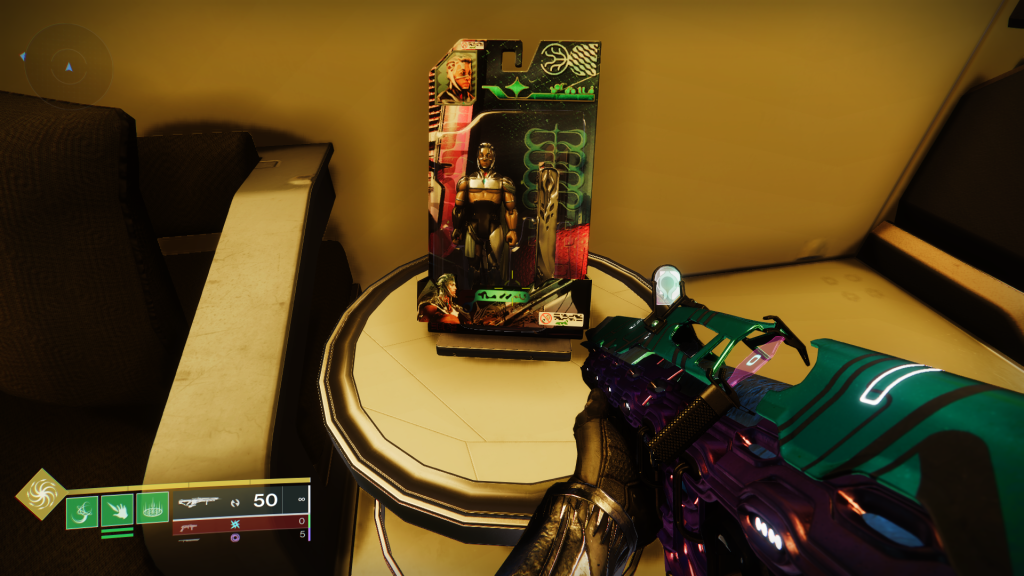
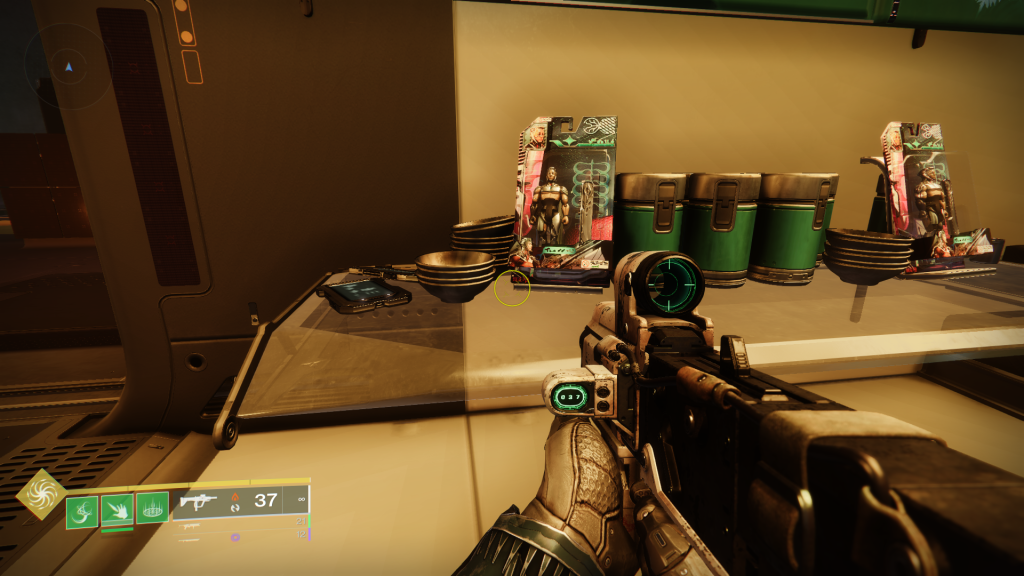
Once you’ve collected your Action Figures, you must take them to Nimbus’ Apartment. To find it, fast travel to the Strider’s Gate zone, and look down over the eastern side of the ledge. This building, seen below, is where you will deposit the Action Figures once you find them.
Jump down from the Watch Tower and be sure to catch yourself with your jump or glide abilities, it’s a long way down and Neomuna’s insurance policies don’t cover broken ankles.

Once you’re down at the front door, simply walk in and deposit the Action Figure you’ve collected at its corresponding stand. Note that each of the Action Figures have clues, as seen in the image below. These clues will be extremely helpful in pointing you in the general direction. However, we recommend following the guide here for each location.
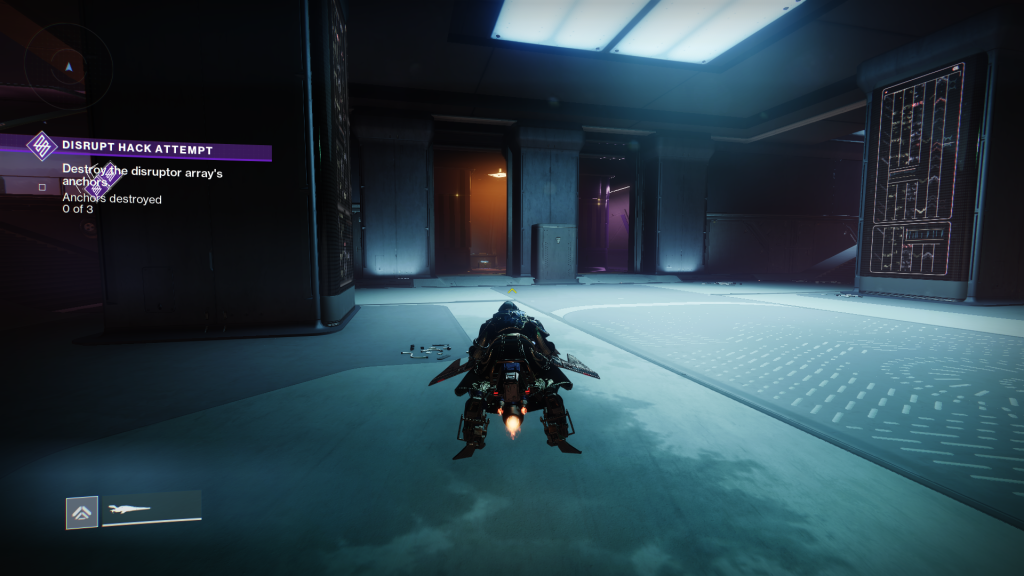
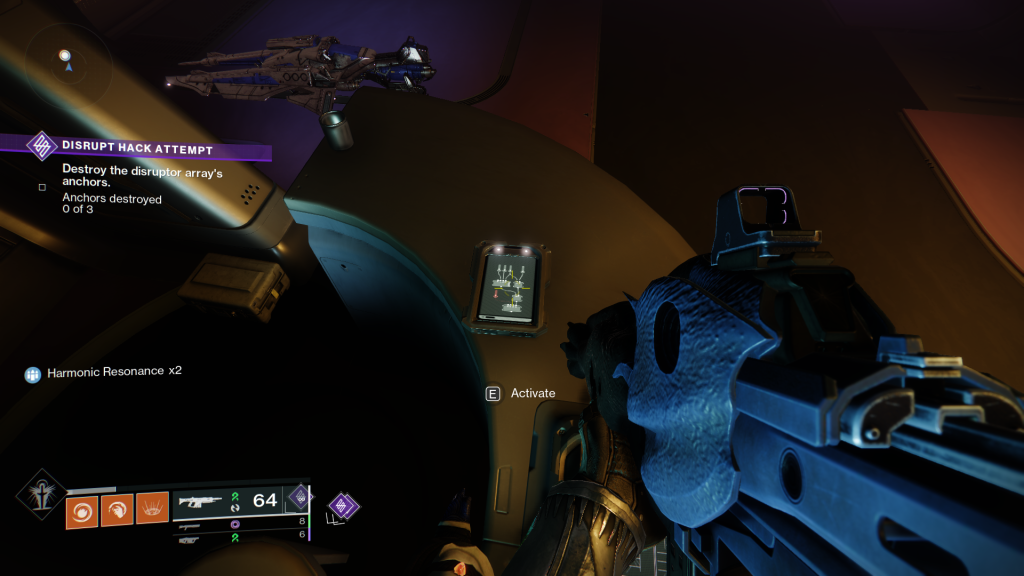
Keep in mind that you won’t be able to access some of the areas required to find the Action Figures until after you complete the Lightfall campaign. Now that you know where to take the Action Figures for the They’re Not Dolls triumph, let’s break down where each one is.
Destiny 2 Action Figure Locations In Week 1
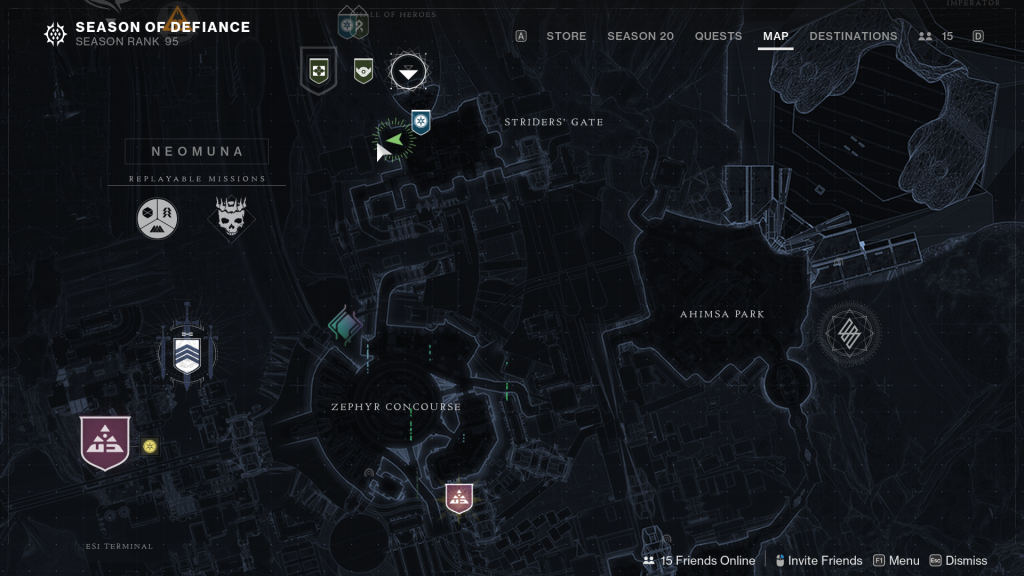
Week 1 is here and we have the first two Action Figures. These are located in Ahimsa Park and the Irkalla Complex. The latter of which will be a long journey, so make sure you get your snacks ready, Guardian.
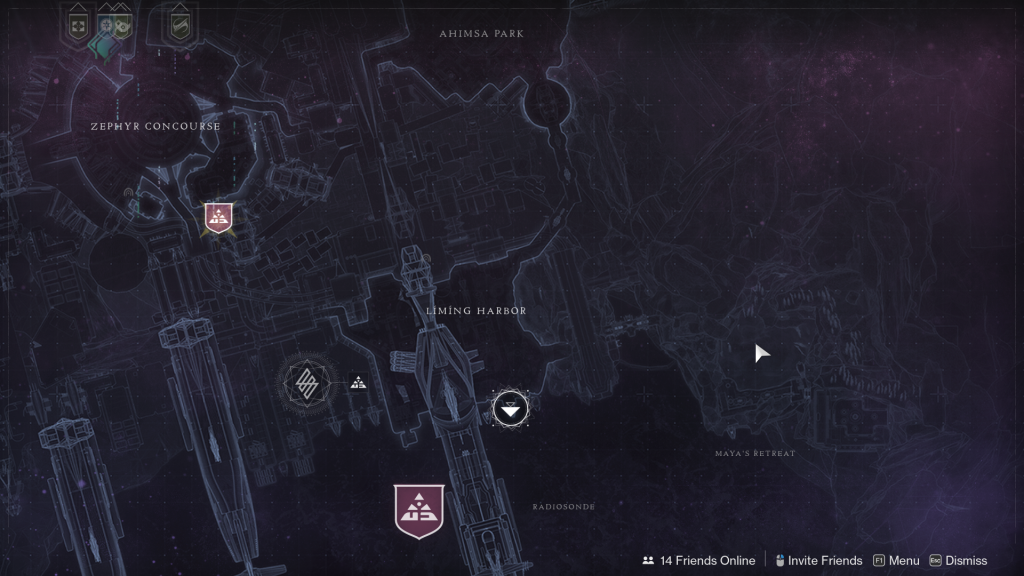
Destiny 2 Action Figure Location In Ahimsa Park
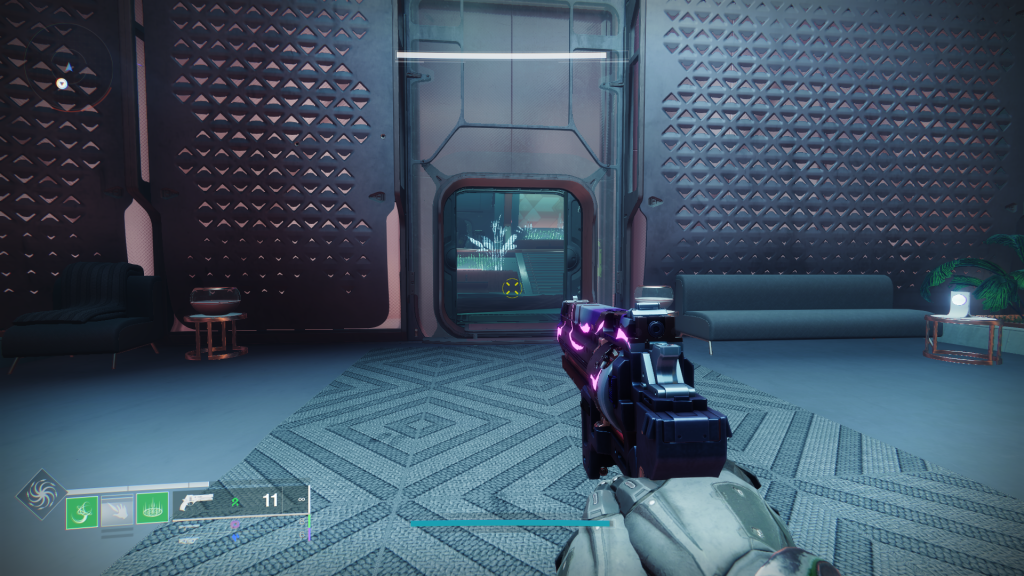
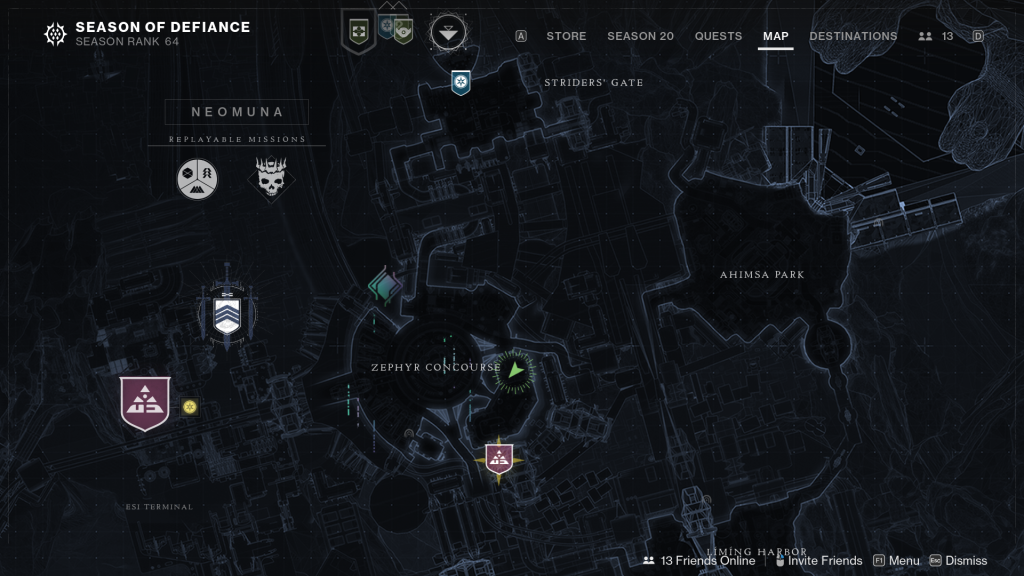
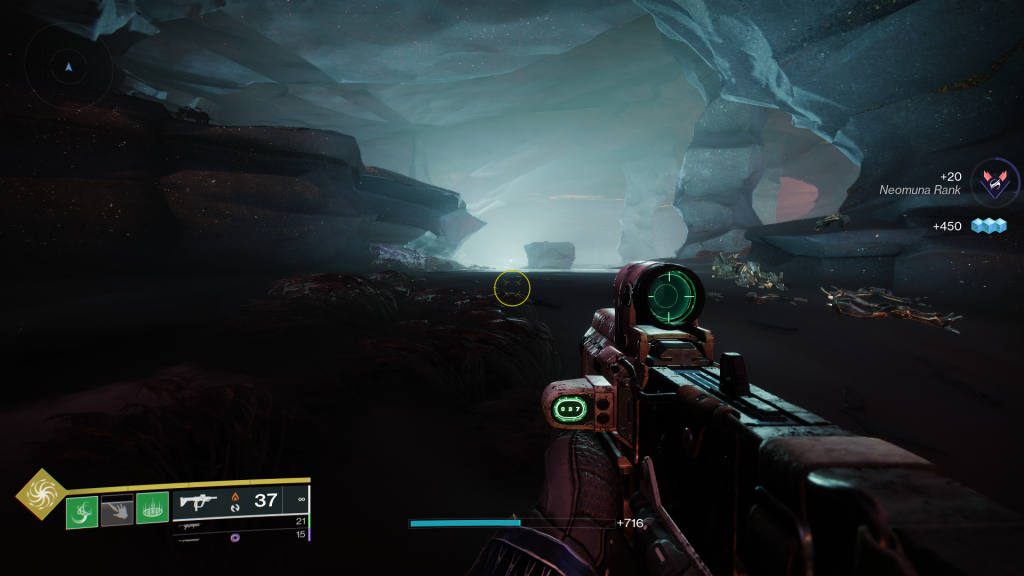
The map above denotes the specific map location of the Ahimsa Park Action Figure. It is right between the “I” and “M” on the map inside the large building in the southern area of the zone.
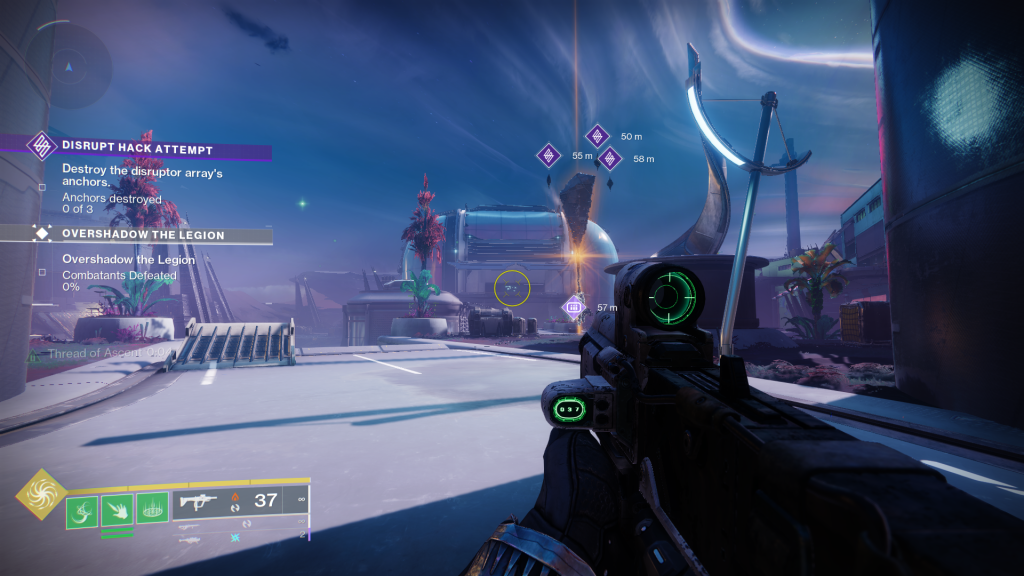
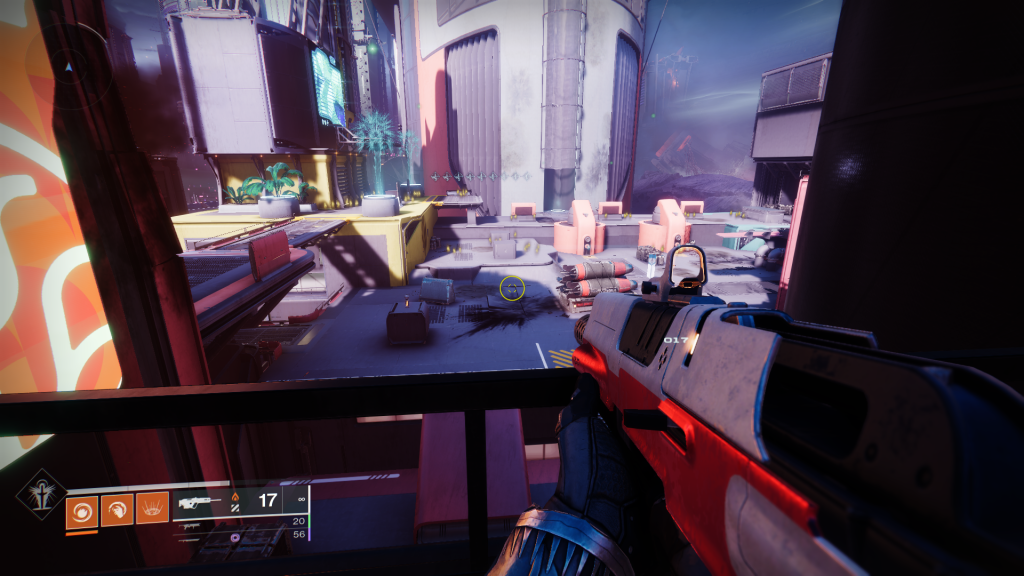
Coming to it from the Strider’s Gate zone, head straight ahead as you leave the tunnel. You’ll see a large, chrome, toaster-like building in the distance. The reticle of the SMG in the image above is where you’ll enter the building.
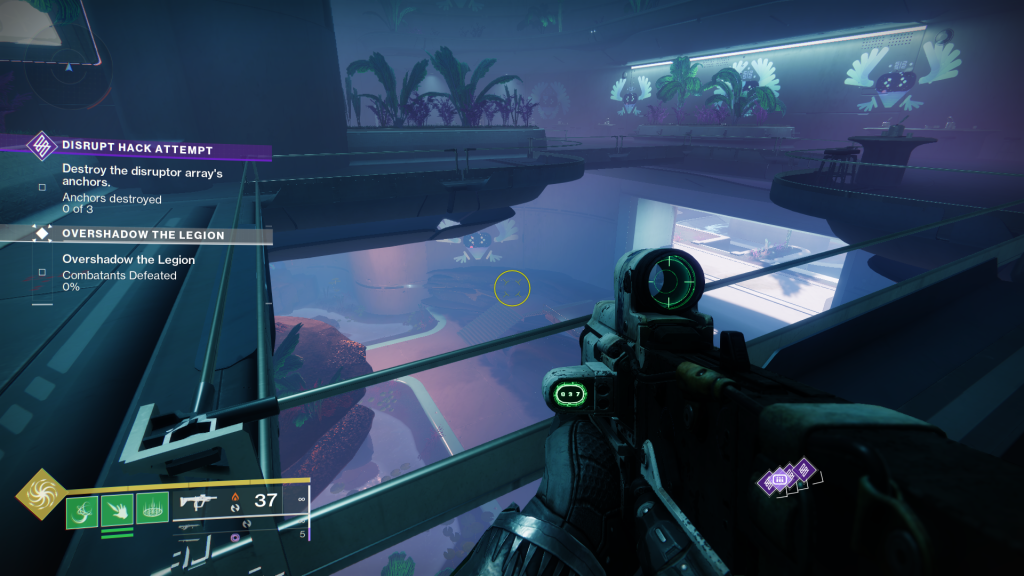
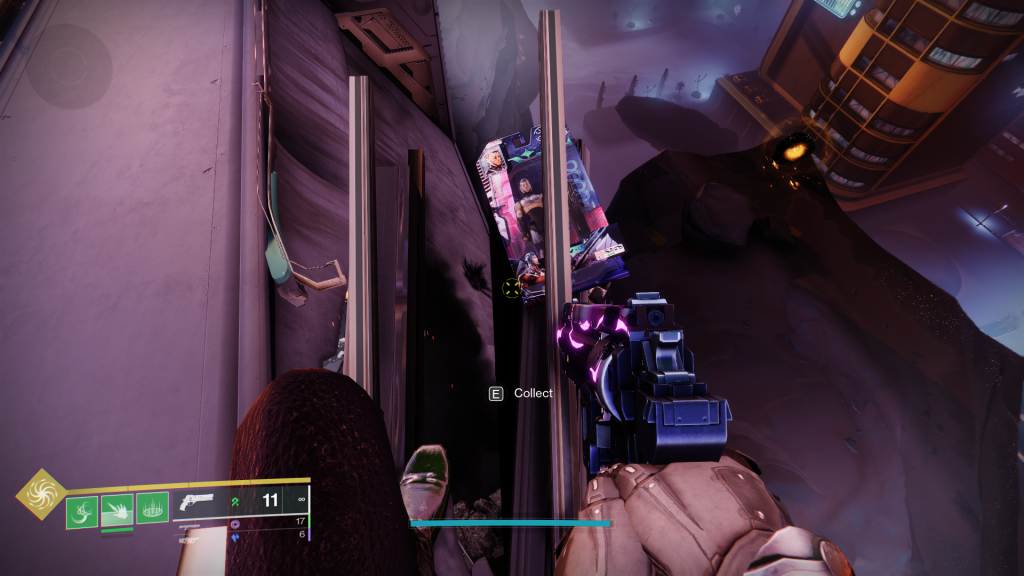
Once you’ve entered the building, you will be on the second level with catwalks meeting in the middle at a central pillar. Look over the right ledge of the catwalk and you’ll find a rainbow mural of one of the game’s Poukas to the left of another doorway. Jump down and make your way to the stairway in front of it.
Once you’ve gotten down to the lower level, you will find a stairway that leads up to the doorway that we saw above. just below the platform at the top of the stairs is a crevasse that you can fit through by crouching. Head through the crawlspace and you’ll find the Ahimsa Park Action Figure.
Hold your interact button and there you go! You’ve collected your first Action Figure in Ahimsa Park! Make your way back to Strider’s Gate to place it down in Nimbus’ Apartment. If you need a refresher, its location is at the top of this guide.
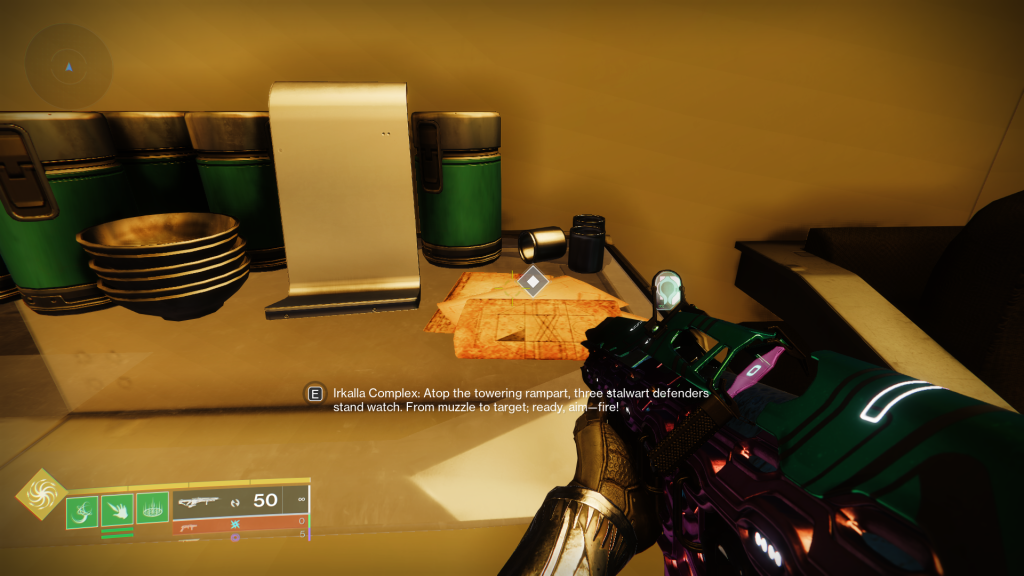
Destiny 2 Action Figure Location In Irkalla Complex
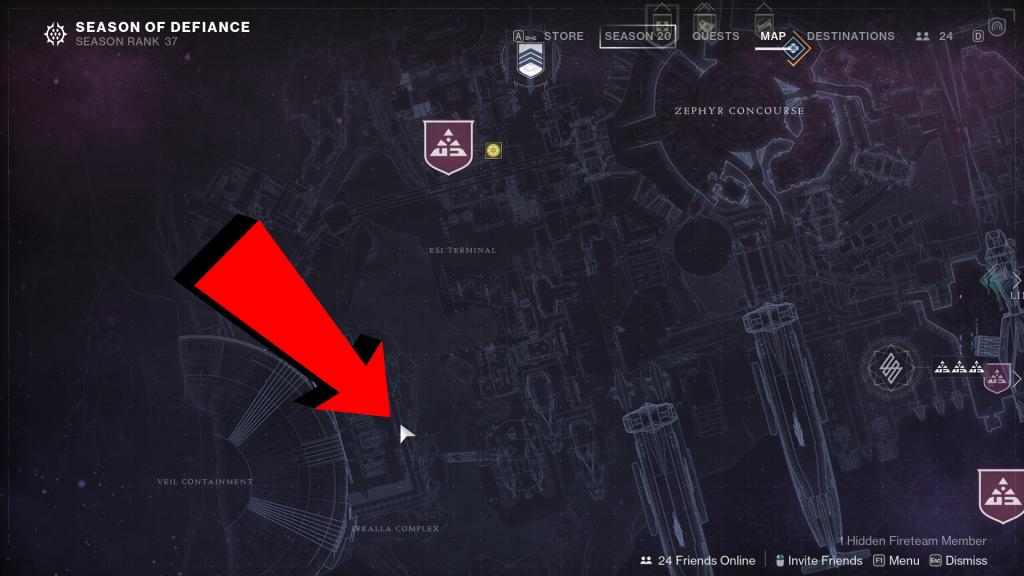
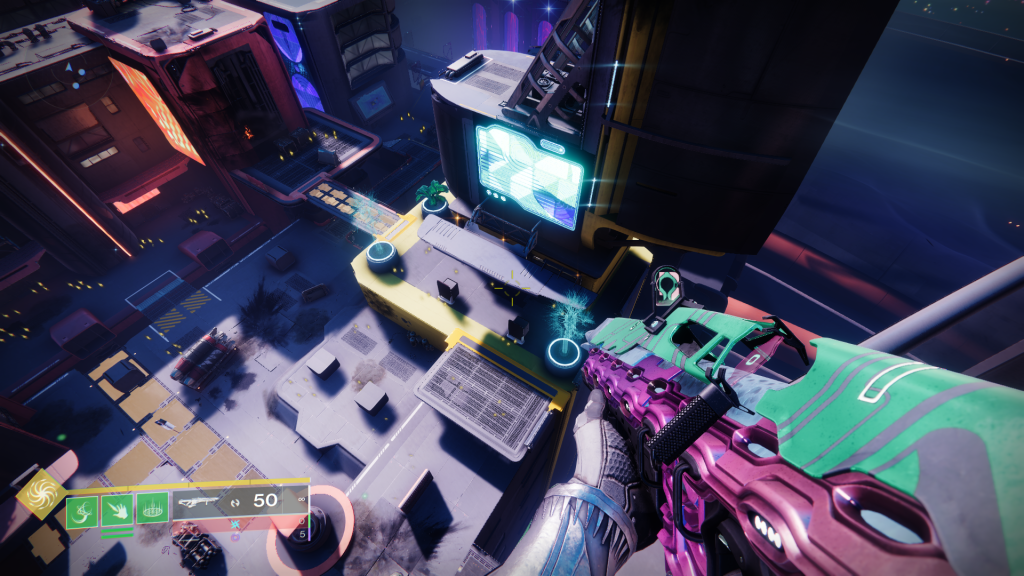
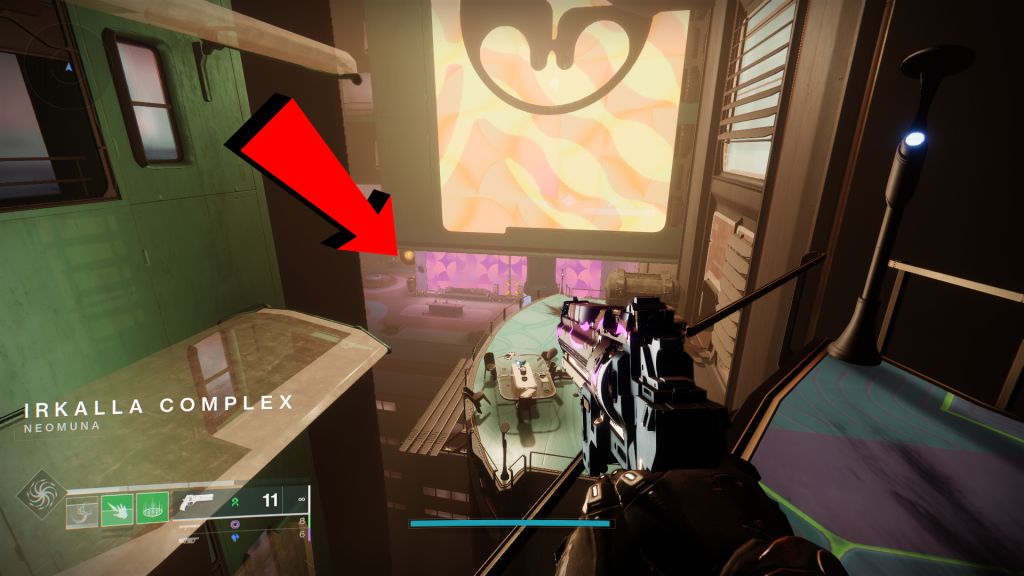
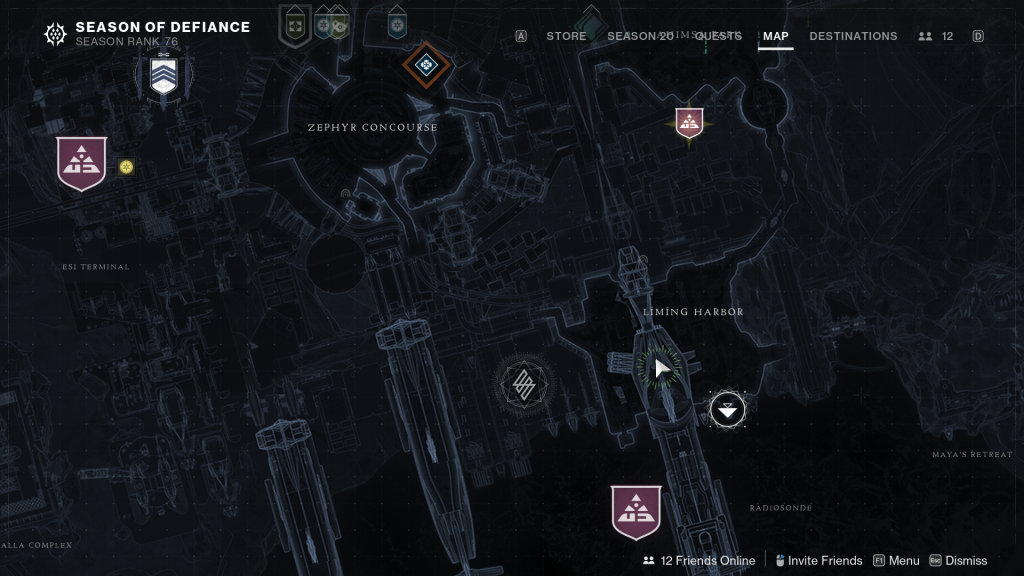
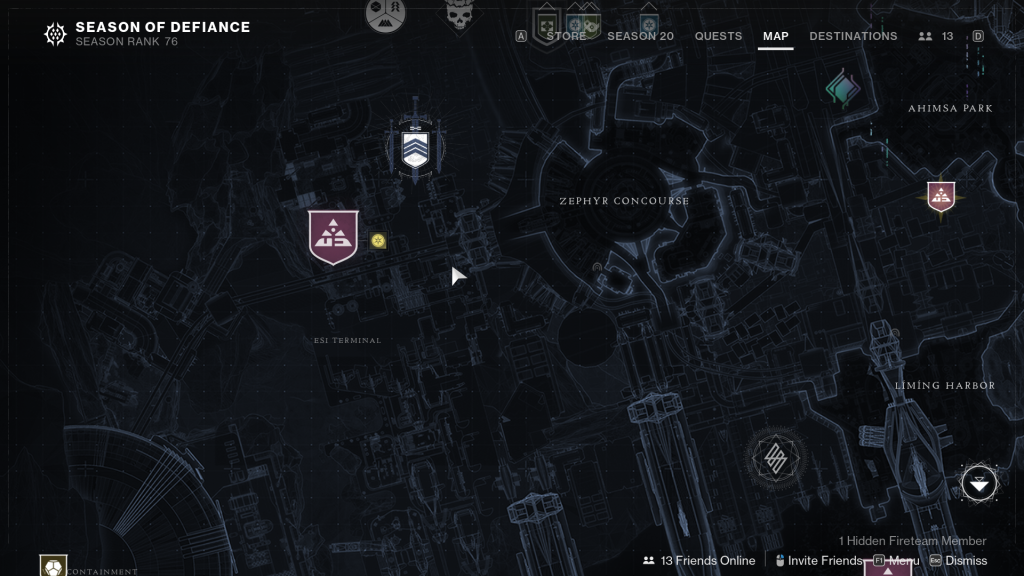
Unlike the Ahimsa Park Action Figure, the Action Figure Location in Irkalla Complex is much harder to find and requires some insider knowledge. The exact location you must reach is marked on the map above. This place will look familiar because it is the same spot where you defended the Veil with Caital at the end of the Lightfall campaign.
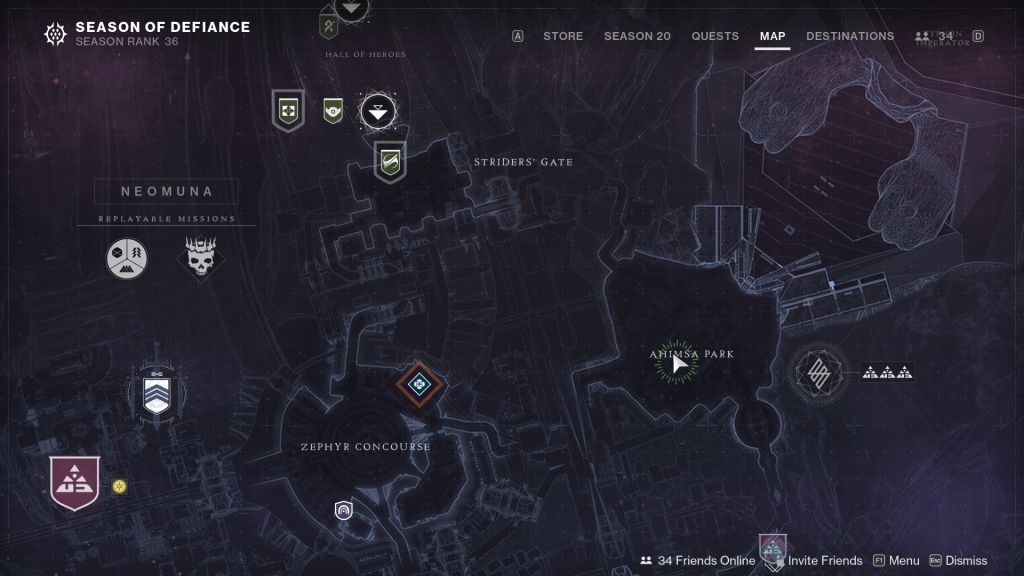
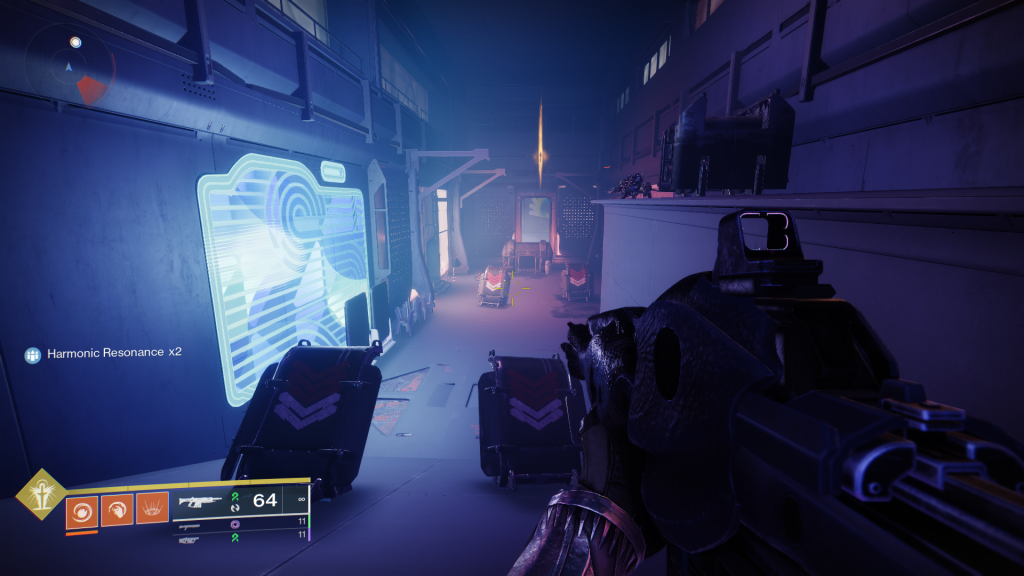
To reach this location, begin your journey at the Strider’s Gate location. From here, head down to the right towards Zephyr Concourse. Once you’ve made it there, head towards the western side of the zone with the path that will block your sparrow. Following the hallways will let you out in Esi Terminal.
Once you’ve made it into Esi Terminal, turn left towards a few Cabal units. Instead of following the path to the right, continue straight. There will be a door that is locked during the Lightfall campaign but becomes accessible once you’ve completed it.
Going straight through the Cabal forces, the door will take you through some winding corridors, but keep rolling forward and you’ll find your way to the other side.
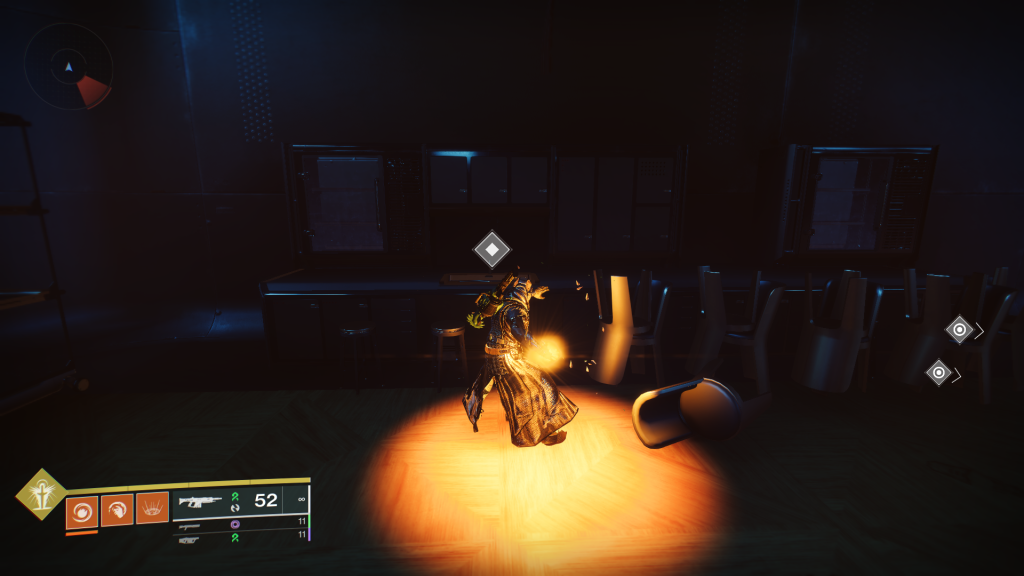
After you’ve made it out on the other side, you’ll find yourself in the jumping section of the Desperate Measures campaign mission. Hopping to the right onto a balcony, you’ll see a Darkness portal positioned to the left of a glowing, pink sign across the rooftops.
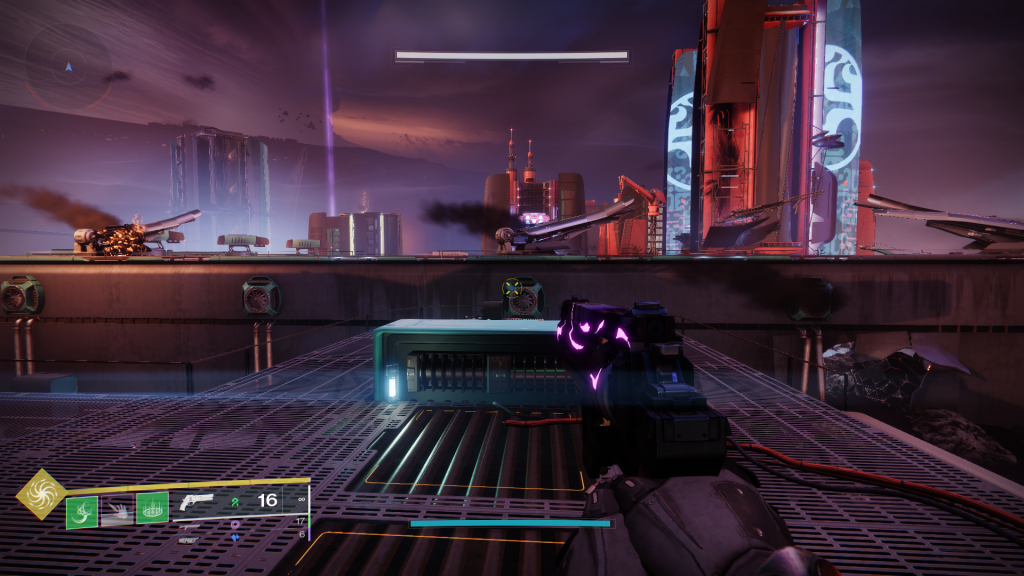
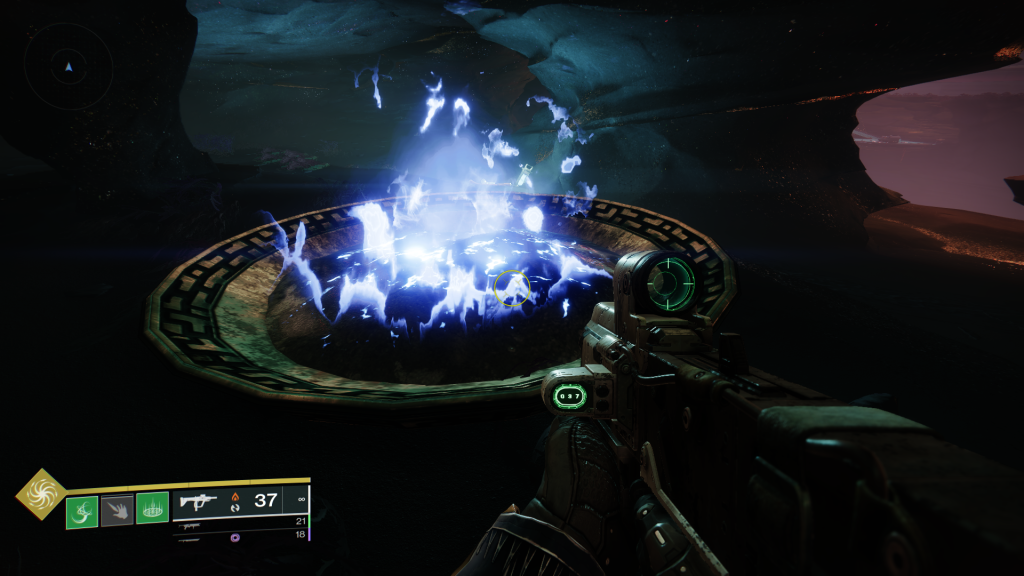
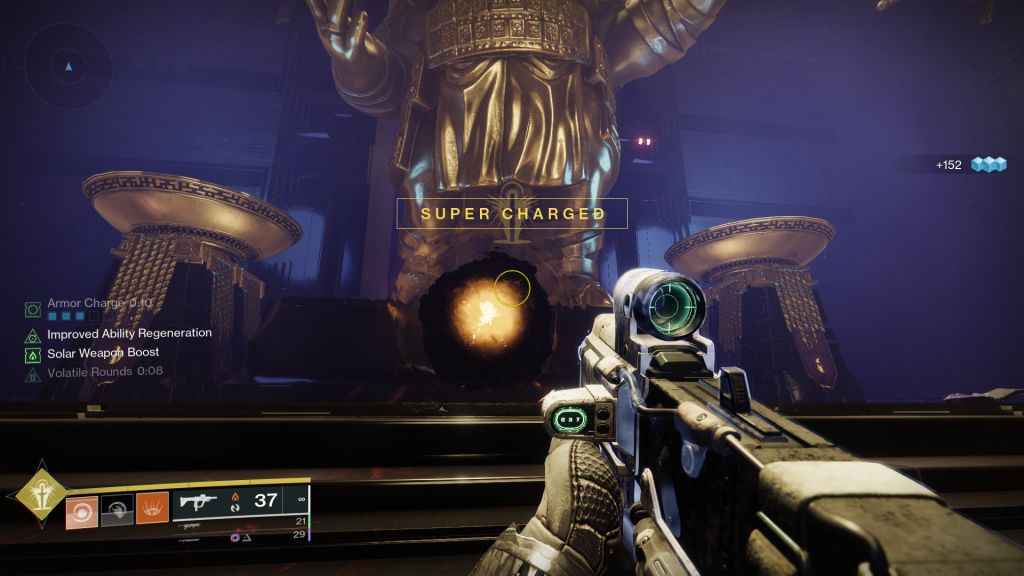
Make your way to the portal and head through. This will take you to the main gate of the Irkalla Complex. Here, make your way to the top with the three Anti-Aircraft turrets. To begin solving the puzzle, you must stand at the very end of the barrel of each of the destroyed AA guns.
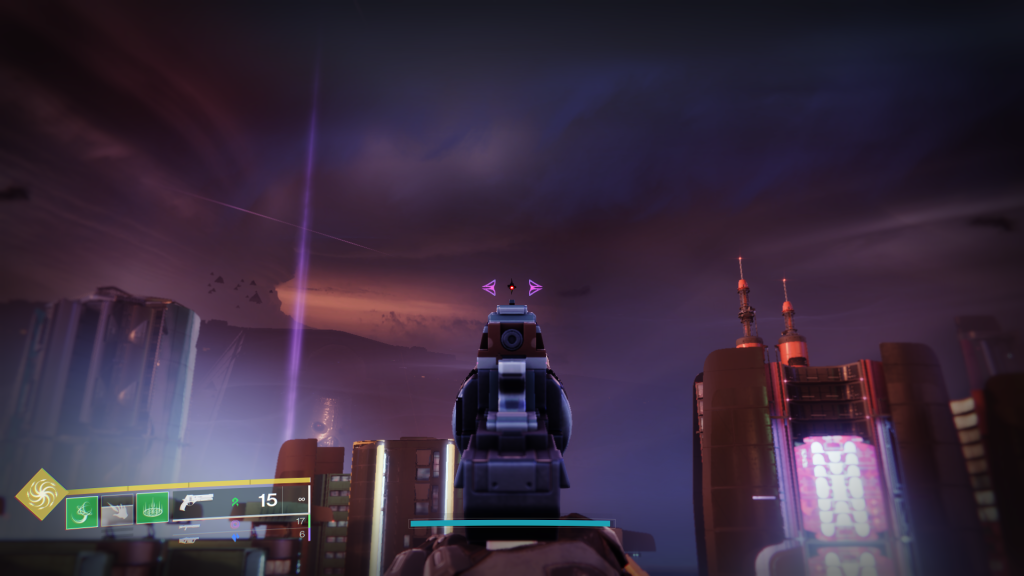
To solve the puzzle, stand at the very end of each of the turrets one at a time and look in the direction that they’re pointing. off in the distance, a small Darkness Node will appear. These can be destroyed with any weapon, but we recommend using a sniper rifle to simplify both finding them and breaking them.
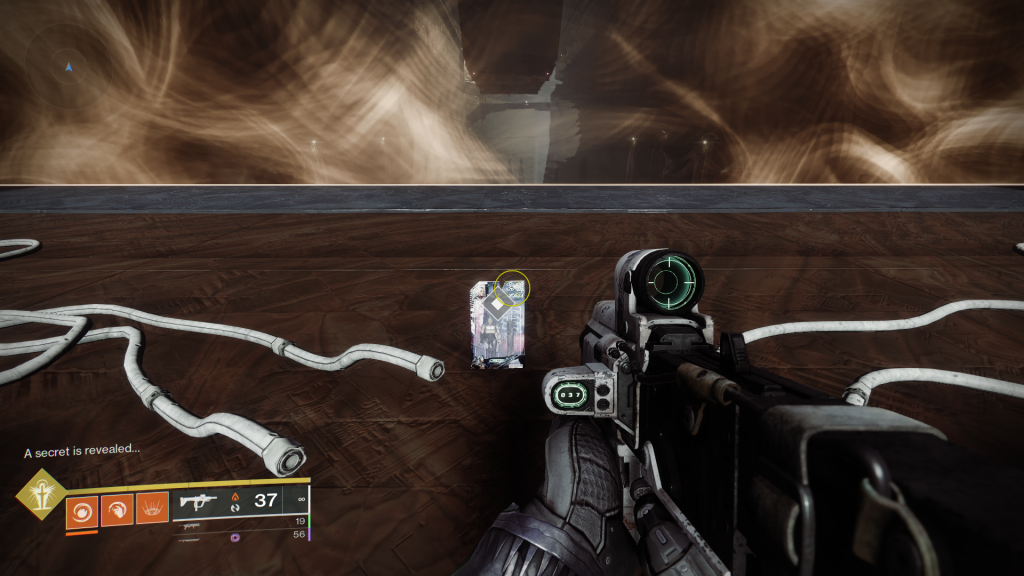
After destroying all three Darkness Nodes in any order you choose, you’ll get a message in the feed saying “A secret is revealed…” and the Irkalla Complex Action Figure will appear at your feet at the end of the turret. Note that if you’re not getting the Darkness Nodes to spawn, you must be at the very end of the weapon’s barrel for it to appear.
That’s it! You’ve now found the Irkalla Complex Action Figure Location! You can take this one back to Nimbus’ Apartment in Strider’s Gate. If you need a refresher on where to find it, head back to the top of this guide.
Destiny 2 Action Figure Locations In Week 2
This week’s action figures are easier to reach, but both require some puzzle-solving. Here’s the breakdown of the Zephyr Concourse and Maya’s Retreat Action Figure locations.
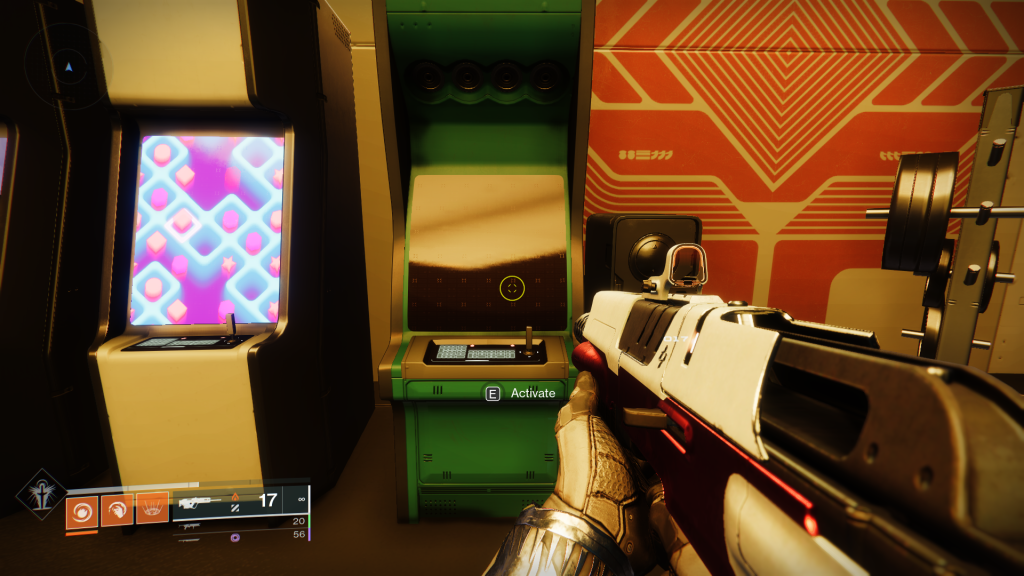
Action Figure Location in Zephyr Concourse
The Action Figure is Zephyr Concourse isn’t hard to find, but knowing what to do when you get there is extremely important. Here’s what you need to know!
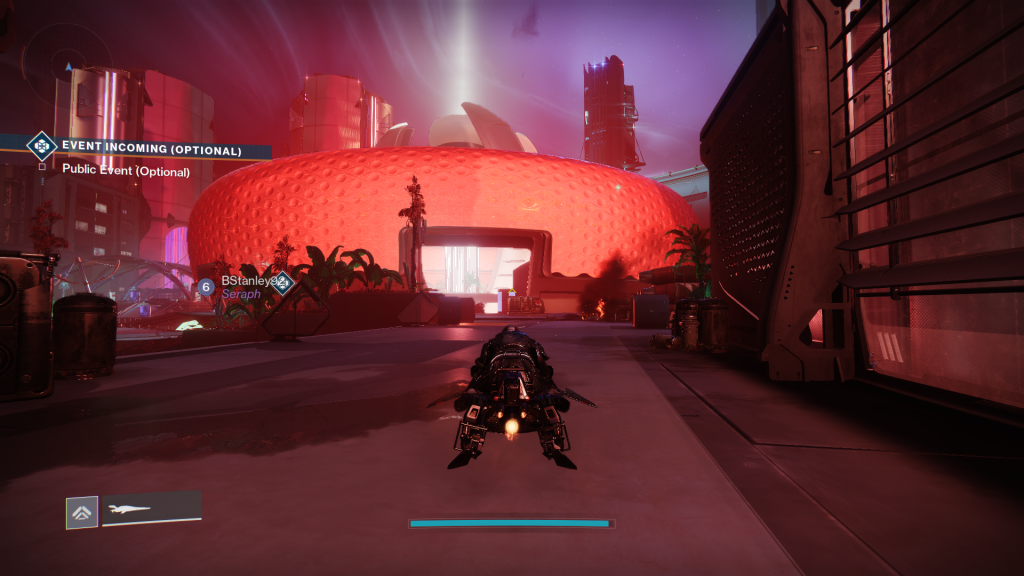
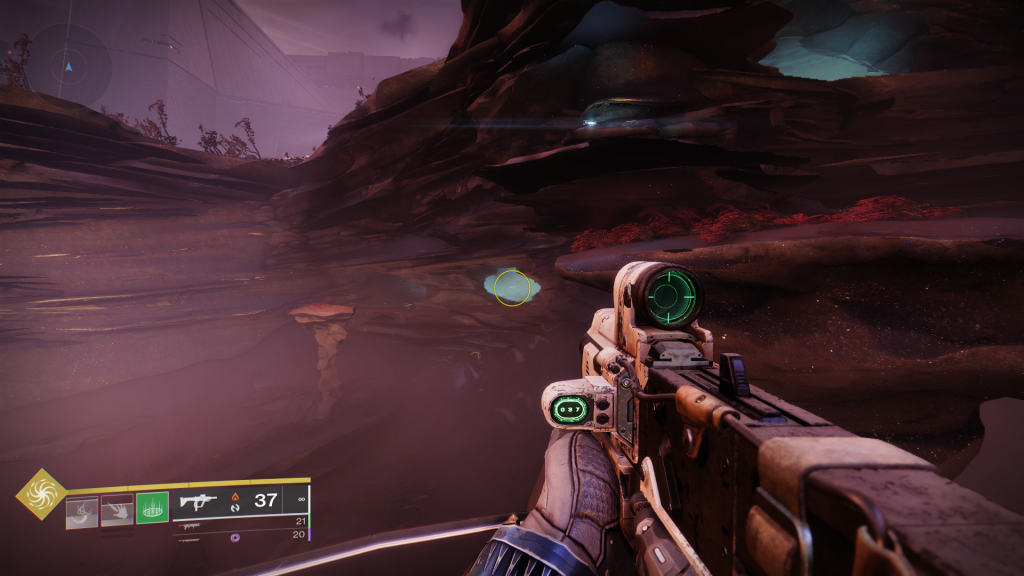
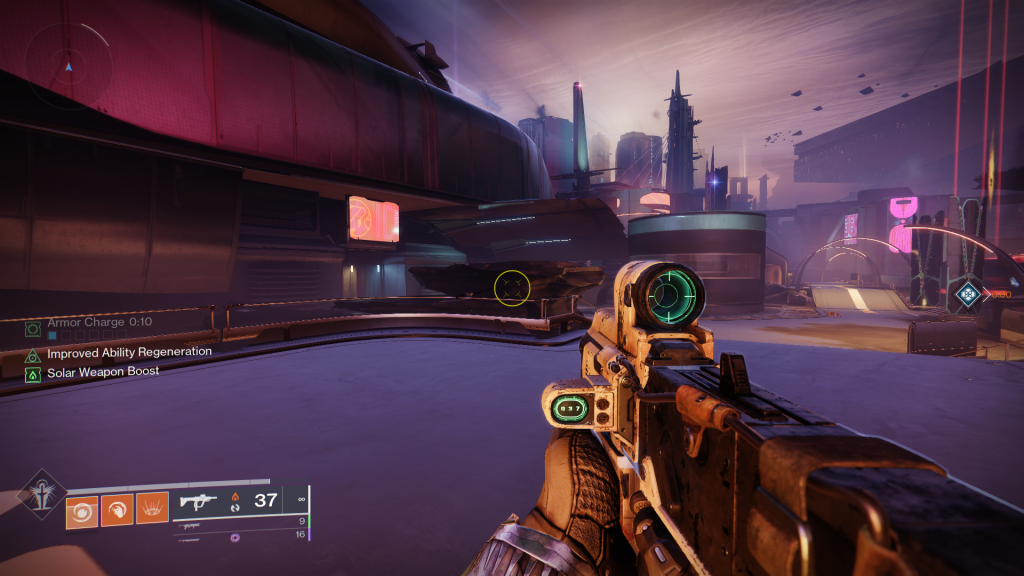
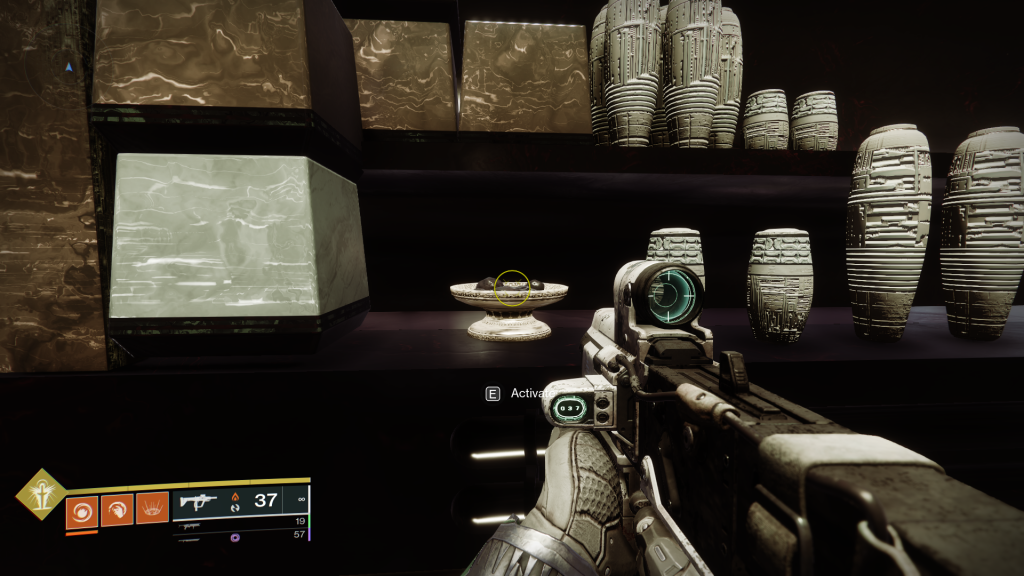
Make your way to the Juice Bar in Zephyr Concourse. Head there from the Watch Tower in Strider’s Gate. As you enter Zephyr Concourse, you’ll see the large, red, domed building with the turbine inside. From here, go left towards the Juice bar as seen in the screenshot below.
Once you arrive, there will be a datapad with an “Activate” prompt. Upon activation, a minigame will start where you have to keep the Cabal forces away from the bar. Don’t worry, they’re not too challenging, but after a few seconds of playing keep-away, the Action Figure will spawn. Note that if you leave the bar, the game will fail and you will need to restart, so sit tight!
Once you’ve collected your Action Figure, you can head back to Strider’s Gate and take it to Nimbus’ Apartment and set it where it belongs! There you go! Everything you need to know about the Zephyr Concourse Action Figure Location!
Action Figure Location In Maya’s Retreat
The Action Figure in Maya’s Retreat requires that the player light 3 fires around the area in 3 separate caves. There is no time limit on these so take your time and explore. Our guide here is our recommended path to ensure you don’t miss a thing.
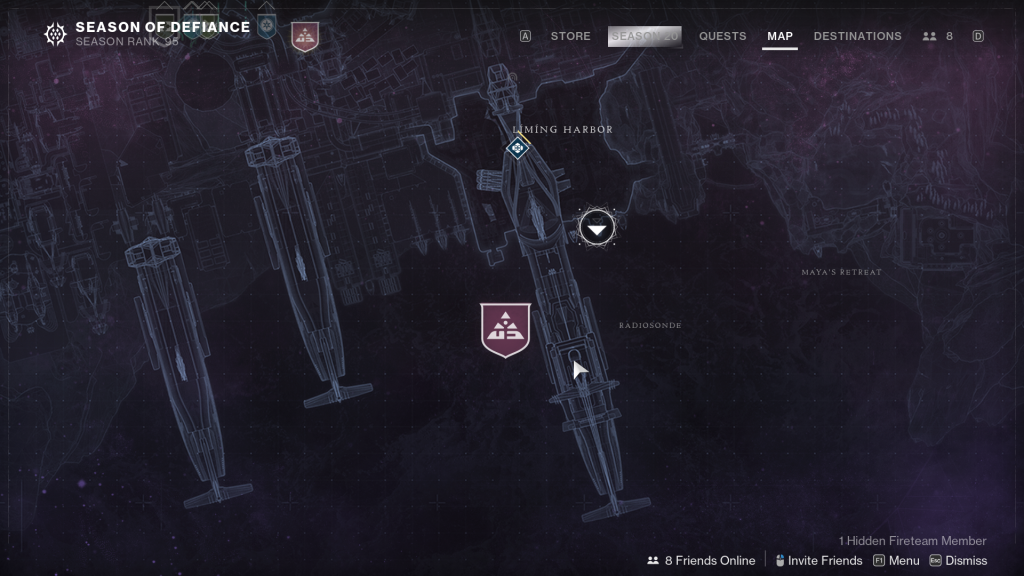
To get the Action Figure in Maya’s Retreat, fast-travel over to Liming Harbor and follow the path toward the Campaign and HyperNet Current strike area off to the right.
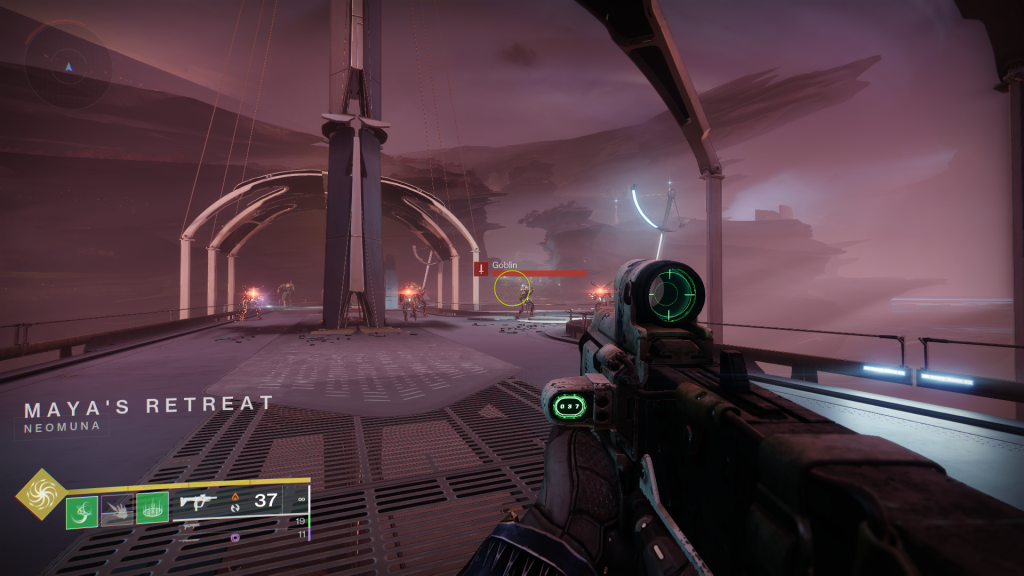
Once you make your way through to Maya’s Retreat, you’ll want to follow the path forward until you get to the small plateau surrounded by a few Vex Goblins and a Minotaur. We recommend you follow the path to the right as though you were going through the Strike.
Follow this path until you come across the first fire in the large cavernous area just before you would exit into the small island that takes you to the Vex Network in the HyperNet Current Strike.
When you find the fire, you will see a prompt to hold the action button to “Activate” the fire. Doing so will light it and you can continue to the next two.
Head back out of the cave, toward the platform that you had to stand on to get in it. Here, you’ll see a smaller cave below and to the left of the first cave.
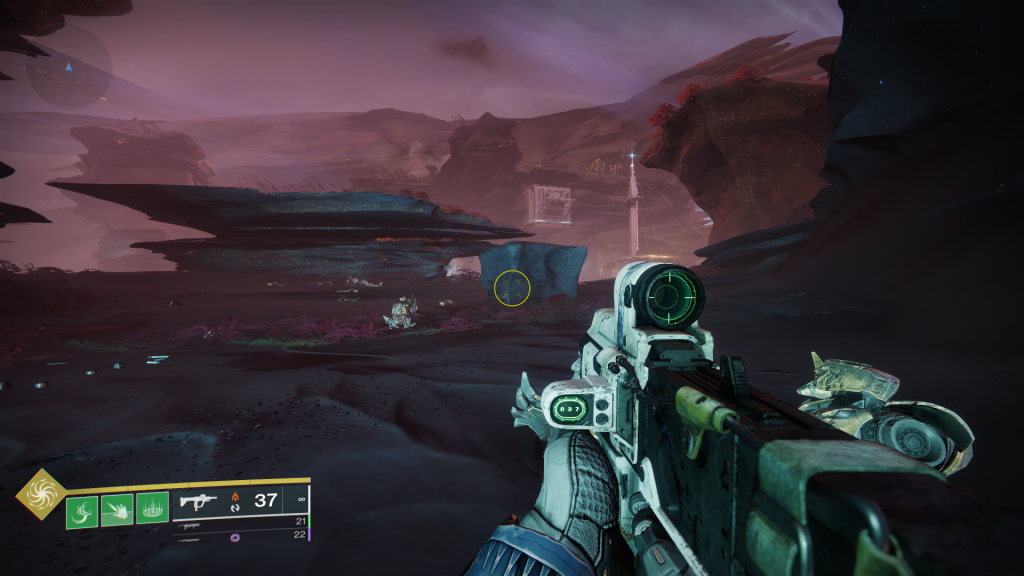
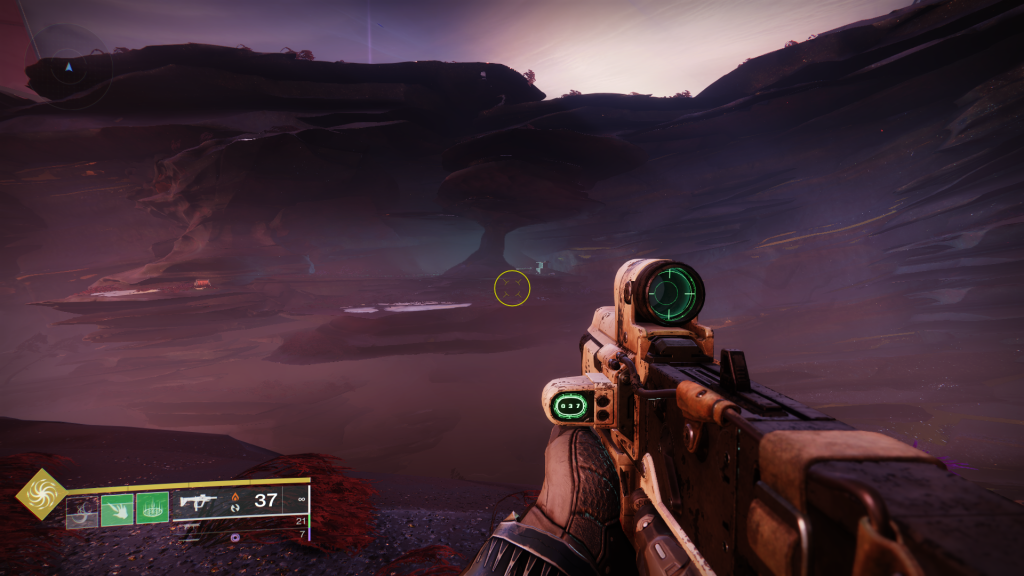
Around the pillar separating the entrances will be the second fire dish. Activate it to light it, and you’re almost done! The third cave is towards the beginning of this area. To get there, climb the ledges that are on the right-most wall of this area and they will take you right to it.
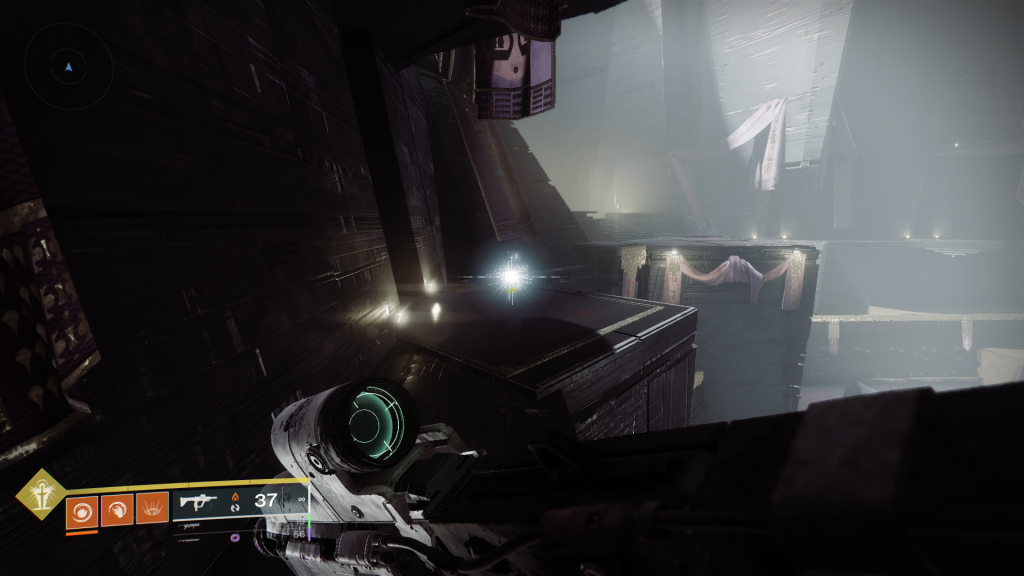
After you make it to the outcropping you see in the screenshot above, you’ll be able to see where the last fire must be lit. Again, this cave gives off a fainter glow than the other two, but follow the blue light and it will take you to the next firepit.
Head into this cave and the firepit will be there waiting for you in an obvious, open space. Activate it, and wait for the Action Figure to spawn.
That’s it! You’ve now collected your fourth Cloud Strider Action Figure! Head back to Nimbus’ Apartment in Strider’s Gate to place it on its spot and progress your Triumphs. If you’ve forgotten where to find it, the location is at the top of this guide!

Destiny 2 Action Figure Locations In Week 3
Week 3 is here and that means 2 more Action Figures to collect! Let’s get our best add-killing gear on because this week is another combat challenge! Here’s where you can find the Liming Harbor and Esi Terminal Action Figure Locations for Week 3!
Liming Harbor Action Figure Location
Like the Zephyr Concourse Action Figure last week, this guy isn’t too hard to find, but it is a combat-oriented puzzle, so get ready!
To begin, fast-travel over to the Liming Harbor zone on Neomuna. Once there, you’re just going to take a little stroll to the left where you’ll see a large building with a hotel-like front desk. Once you’ve made it there, stand on top of the desk and activate the datapad. Doing this will begin the combat challenge!
During this combat challenge, There will be four types of Vex that will charge at you: Fanatics, Goblins, Hobgoblins, and Minotaurs. This is important to keep in mind because all of them except the Minotaurs will be orange bar enemies. The goal here is to kill them before they can get through the lobby and into the doors behind you. Keep your weapon unscoped for as much as possible so that you can watch your radar! The longer it goes the more intense it is, but it never gets too crazy.
After you’ve survived the onslaught, a secret will be revealed and the action figure will appear at your feet! Congrats, you got another Action Figure! Take it to Nimbus’ Apartment and deposit it there for your Triumph progress. Now, let’s get ready to bus some tables!
Esi Terminal Action Figure Location
The goal of this Action Figure is simple! Collect some dishes and drop them in the sink. Except, the dishes are Darkness orbs and the sink is protected by a handful of immune Gladiators!
Make your way over to the Zephyr Concourse hub from your favorite fast travel location on Neomuna. Once there, head towards the turnstiles that will try to block your Sparrow at the western side of the Concourse towards Esi Terminal. Make your way through the winding hallway here until you get to Esi Terminal. Here, take a left like you’re going to go to the Irkalla Complex, but when you can, take the first right into a group of Cabal guarding two doors.
From here, head into the door on the left and follow it until you find an activation interaction in this bar and restaurant area. Activate it and 5 Darkness orbs will spawn along with some Gladiators that will be completely immune to damage. Make sure to avoid them as you make your way to the sink at the back of the room to deposit the charge. Repeat this for all 5 charges and the secret will be revealed to you!
Congrats! You’ve managed to collect another set of Action Figures! Like always, don’t forget to take them back to Nimbus’ Apartment to earn progress for your Triumph.
Radiosonde, Typhon Imperator, and Striders’ Gate Action Figure Locations
Another week and the last 3 Action Figures have revealed themselves. This week has one of my favorite Action Figure puzzles so far, so strap in! By this time, you’re probably pretty familiar with the layout of Neomuna. But just in case, we’ll make sure that we give you everything you need to know to collect the Week 4 Action Figures for the They’re Not Dolls Triumph.
Radiosonde Action Figure Location
This is another puzzle-based collectible, but don’t stress about figuring it out. We’ll show you the exact order of operations. First, let’s get over to the puzzle.
The first Action Figure this week in is Radiosonde which is one of the campaign spaces. Fast travel over to Liming Harbor and head left like you’re going to Zephyr Concourse. Instead of continuing straight through, make a slight detour to the left again under the orange billboard and into the building with a catwalk.
Head up that catwalk and continue along this path for a while. You can ignore all of the enemies in your way until you get to the Purple room with a big turbine. Kill all of the enemies in here to unlock the door to the room with a Terminal in the middle.
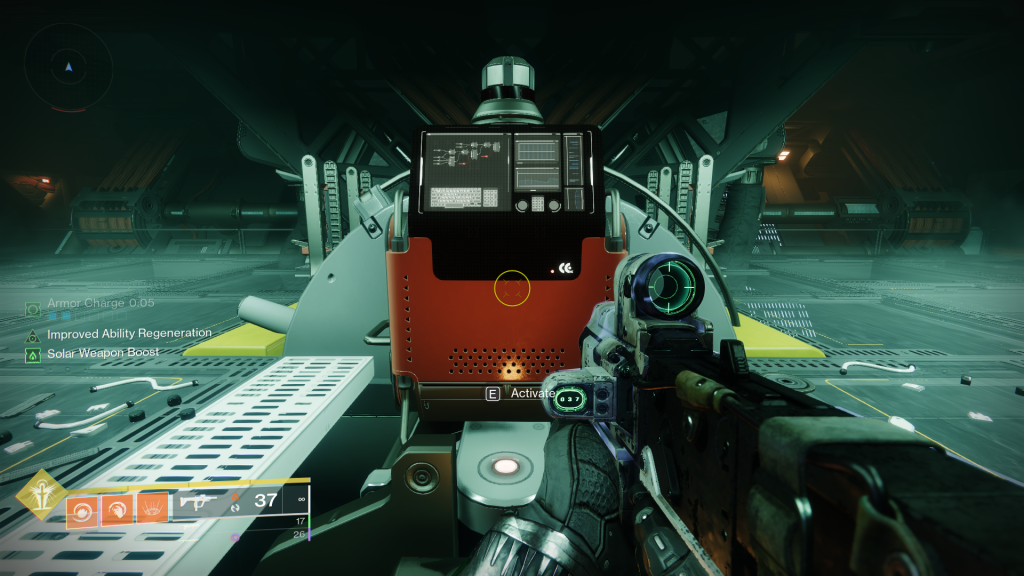
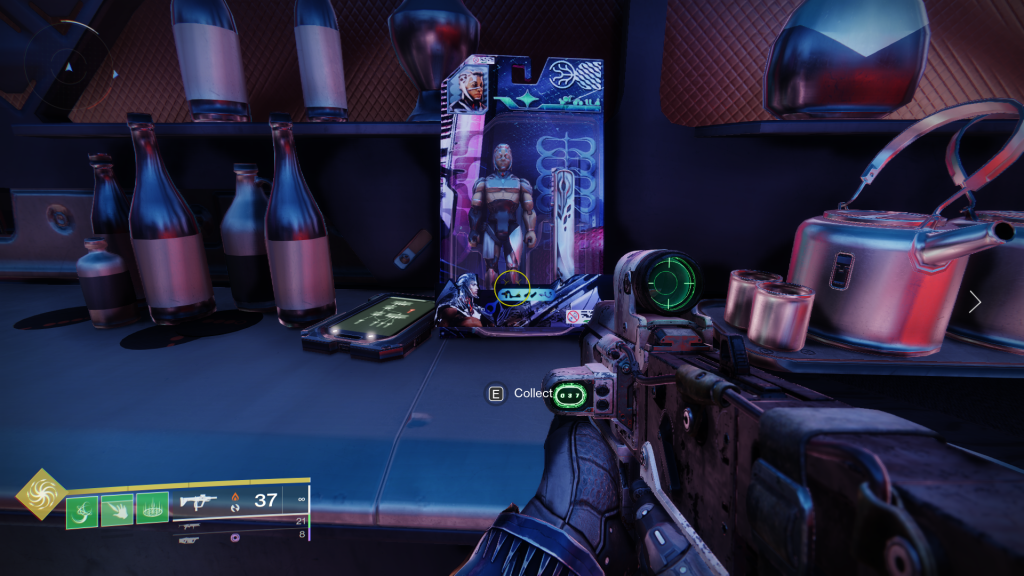
Approach the Terminal in the middle of the room and activate it. Once you do, turn around and you’ll see two rows of four nodes that you have to shoot in a specific order. Doing this will spawn the Action Figure at the base of the Terminal.
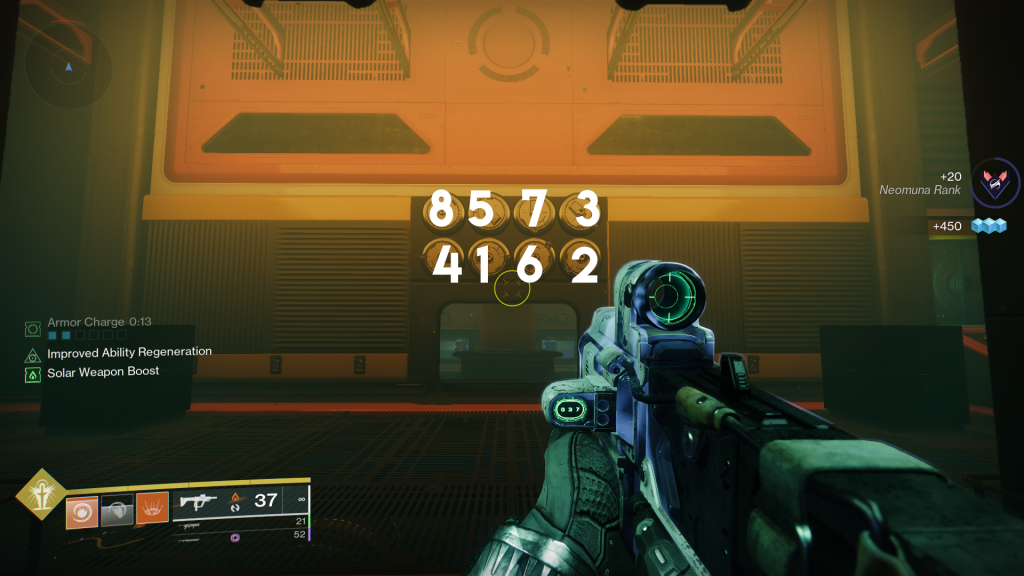
Shoot them in the order they appear in the screenshot above. I’ve also included a table below if that’s more helpful for you!
|
8 |
5 |
7 |
3 |
|
4 |
1 |
6 |
2 |
That’s it! You’ve now unlocked the Radiosonde Action Figure. Take it back to Nimbus’ apartment to advance your Triumph and get ready to explore the Typhon Imperator!
Typhon Imperator Action Figure Location
To locate the 8th Action Figure, make your way over to Ahimsa Park. We’re going to go deep inside the Typhon Imperator.

Make your way inside until you come to a Darkness portal.
This portal will take you to the Arena room at the back of the Typhon Imperator. It should look very familiar if you’ve done the campaign and some of the post-campaign content. Kill the enemies inside, and make your way to the Dish on the right side raised platform.
After you activate the dish, a Vex node will appear behind you. You must quickly collect them as they appear. Once you’ve collected the first one, the next will appear, and so on.
Once you’ve collected all of the nodes, the Secret will be revealed, and the Action Figure will spawn at the end of the path between a few cables!
That’s it! Once you’ve collected it, make your way over to Nimbus’ Apartment and you’ll be all set to grab the last one! Get ready, this is my favorite one.
Striders’ Gate Action Figure Location
You’ve done it. You’ve made it to the final Action Figure in Nimbus’ collection. For this one, we’re going to stay in Nimbus’ apartment and play his Arcade cabinet!
Make your way into Nimbus’ Apartment and head over to their arcade cabinets. Activate the one on the far right to begin the challenge!
Once activated, you’ll be teleported outside onto a balcony. Here, you’ll see these small, hard-to-see canisters. You will also see Vex Glyphs straight in front of you that work as your timer. You must shoot and blow up all of the canisters as they appear to complete the challenge.
Glowing Vex Glyths will occasionally spawn in and must be shot to extend your time. Letting them sit for too long will cause them to despawn, which will almost certainly cause you to reset.
We highly recommend a bow for this challenge, as using anything else will eventually require you to reload, cutting into valuable time needed for getting this done. After you’ve completed the challenge, you will be teleported back into the apartment with your prize sitting nicely on the Arcade cabinet. Collect it, turn around, and deposit your final Action Figure right there in Nimbus’ Apartment.
Congratulations! If you’ve followed this guide throughout, you’ve now collected all 9 of the They’re Not Dolls Triump Action Figures! Now that you’ve done this, you might be itching to get into the Root of Nightmares Raid. We recommend you go and check out our guides to help you conquer that challenge!