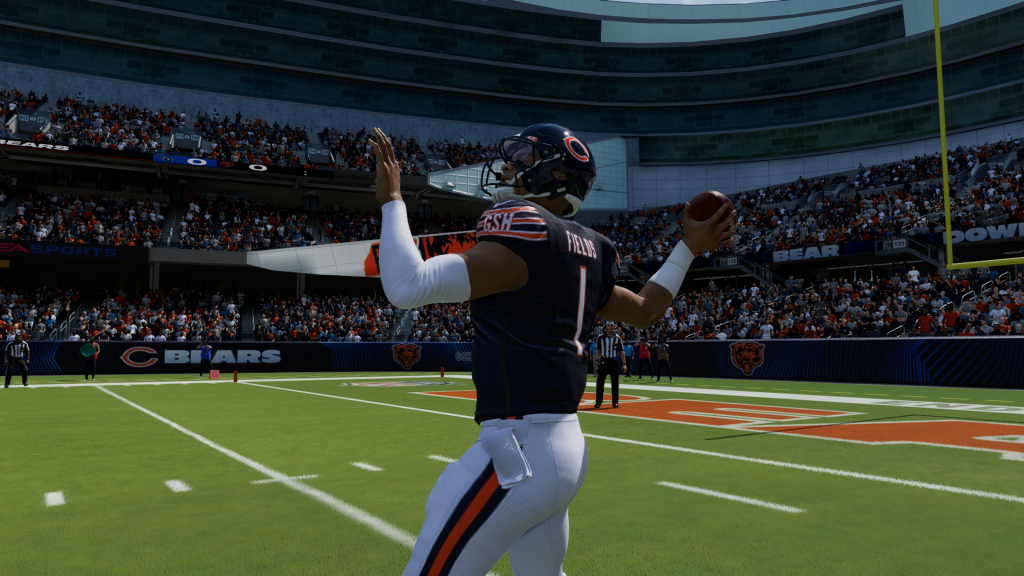
Another year brings new changes as the Madden 24 passing system continues to evolve following the introduction of Skill Based Passing in the previous release. While it’ll take time to really nail the timing and become an expert for players new to the system, this Madden 24 Passing Guide will help you become familiar with things and know where to hone your skills in this year’s game.
This year, we’ve got Skill Based Passing 2.0 as the new system of Madden 23 gets some upgrades in Madden 24 with additional animations and a few rare passing styles. Whether you’re just trying to figure out the timing of how to throw a touch pass or looking to challenge yourself and become a truly prolific passer, this guide will get you on the right track.
Madden 24 Passing Guide
If you’re new to Madden 24 or have been out of the loop for a few years, then you may not be familiar with the Placement + Accuracy system introduced with Skill Based Passing. When launching Madden 24 for the first time you’ll be prompted to set your passing type as Placement + Accuracy, Placement + Power, or go with Classic Passing.
For players who are comfortable with the system of Madden 22 and the few games before that, there’s nothing wrong with sticking to Classic Passing. However, if you want additional control and to level up your game, the best choice is to start working on your skills with Placement + Accuracy.
If you’re looking for a middle ground that utilizes some of the new passing system but relies more on player ratings, Placement + Power takes away some of the timing element for passing accuracy and instead uses the quarterback’s Madden 24 ratings to decide how accurate each throw will be.
While all of these systems are valid and players should always pick whichever they get the most enjoyment out of using, we’re going to focus on Placement + Accuracy for this Madden 24 Passing Guide as it’s quickly become the standard for players and is now in year two with additional refinement via Skill Based Passing 2.0. This system will give you control over pass placement, accuracy, timing of the throw, and pass strength.
Madden 24 Passing Controls
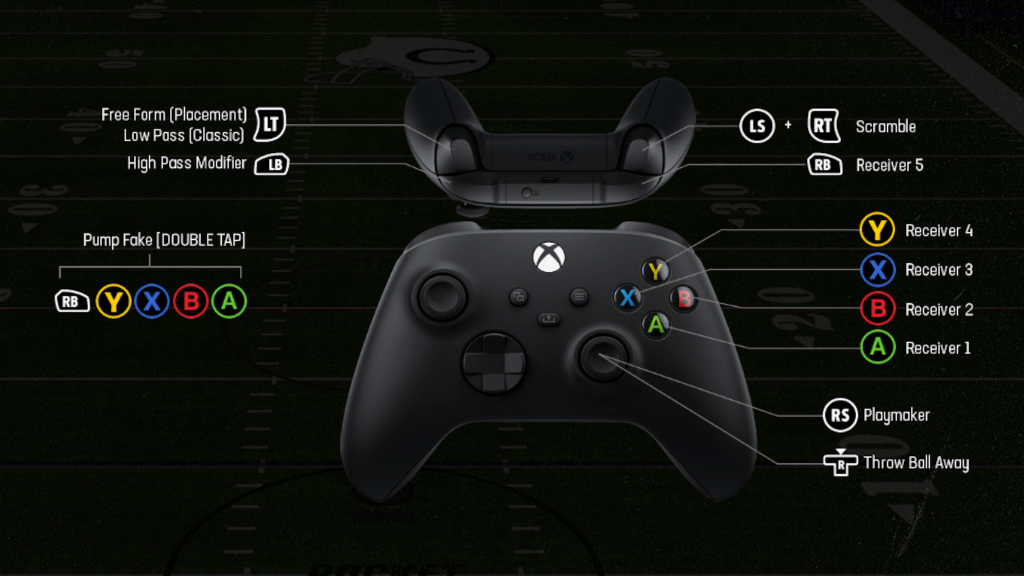
Before we get to the nuances of timing each different type of pass, let’s take a broader look at the Madden 24 passing controls you’ll need to get used to. As a general rule, the first decision you’ll be making when delivering a pass is what type to throw based on timing, which will be covered in more detail below.
You may also want to use a pump fake to trick defenders before scrambling or making a different attempt, and to do so you’ll double tap the receiver icon in quick succession. This will cause your passer to pump fake to that specific receiver, allowing you to then throw to them, another, or not throw at all depending on how that play goes.
As we’ll cover in more detail below, you’ll want to press LT or L2 when throwing in order to activate Free Form Passing which allows a broader placement outside of the standard target area. In either case, you’ll use the Left Stick to maneuver the passing reticle within the target area after pressing the receiver icon. Getting used to the timing of this won’t happen right away, but with practice you’ll be able to pinpoint exactly where you want the ball to go.
How to throw a Lob Pass
If you’re looking for huge yardage and wanna get some air under the ball, the go-to option is usually going to be a Lob Pass. Fortunately, this also happens to be one of the easier passes to execute in Madden 24. The biggest challenge will be figuring out the timing of exactly when you want to deliver a Lob Pass compared to when it will actually reach the receiver.
With a tendency to float down the field, the receiver’s position when you release a Lob Pass will be quite different to where they can potentially catch it. In Madden 24, you’ll want to quickly tap and release without holding down the receiver icon to unleash a Lob Pass downfield.
How to throw a Bullet Pass
Next up we have the beloved Bullet Pass, and this is your best pick if you want to deliver the ball as directly and quickly to the receiver as possible. It’s not always the best choice, as a poorly placed Bullet Pass can often be the easiest for defenders to swat or even intercept.
Be careful with using this if you’re throwing in a crowded area, but if you can pick the right spot and thread the needle it’ll be deadly and effective. To do a Bullet Pass in Madden 24, you’ll need to tap and hold the receiver icon until you’ve released the ball and it’s headed downfield.
How to throw a Touch Pass
For your most difficult option when it comes to timing, there’s always the Touch Pass. While it’s a great option that provides a more balanced middle ground between the floating Lob Pass and direct Bullet Pass, getting the exact button press right will take some practice. You can work on this in Team Practice and Quick Play before jumping into a game mode with higher consequences.
In order to complete a Touch Pass, you’ll want to press the receiver icon and hold for just a split second. Having the passing meter visible will majorly improve your ability to time this pass, as you’ll want to release the button when the meter is about halfway full.
Wait too long and you’ll have a Bullet Pass. Release too early and it’ll be a Lob Pass floating downfield. However, once you get used to it, the Touch Pass is a great one to keep in your arsenal.
How to throw a High Pass
If the timing of the throw isn’t enough control and you want to ensure some vertical placement, you’ll also have the option to use a High Pass in Madden 24. In order to do this, you’ll need to hold LB or L1 before pressing the receiver icon to execute the pass.
This is a particularly useful option if you’ve got a tall receiver like Mike Evans and are throwing into an area with decent traffic from defenders, as a well executed High Pass can have a better chance of being snagged while also minimizing your chances of getting intercepted.
How to throw a Low Pass
Similarly, you’ll also have the option of using a Low Pass in Madden 24. The exact situation isn’t too far off, as the benefit of a Low Pass is that they can be particularly difficult to intercept. They can, unfortunately, also be particularly difficult for your own receivers to catch.
However, if you see a risky opening and want to utilize a Low Pass, you’ll need to hold LT or L2 while pressing the receiver icon. If your timing is off on when to deliver this it can easily go into the ground, but that may be a safer option than it ending up in the hands of a defender.
How to throw a Back Shoulder Fade Pass
While not technically a pass type influenced by a button press, players looking to do a Back Shoulder Fade can do so by using a specific type of placement within the target area while passing. If you use the left stick to after pressing the receiver icon to place the reticle down and to the outside (to the right on that side of the field), it’ll execute a Back Shoulder Fade.
How to use Free Form Passing to stretch the Target Area
Finally, there’s Free Form Passing which you’ll only want to use once you’re familiar with all of the basics of the passing system in Madden 24. In order to utilize Free Form Passing, you’ll need to hold LT after pressing the receiver icon to free up the reticle from the target area.
You can adjust in Game Options under your Madden 24 settings whether Free Form Passing allows you to move the reticle near or just outside the target area, far outside the target area, or set it to No Max Distance to give you the most freedom. Be careful with this until you’re used to Free Form Passing, as No Max Distance also means you can accidentally place the ball completely out of reach much easier.


