Table of Contents
As you get moving through Enshrouded, one of the earliest quests you’ll tackle is Find the Sleeping Survivor. Several early tasks can be completed before you make your way to them, and you’ll need the right equipment to finish this journey.
If you’re struggling with reaching the area on your map or simply can’t fight your way in, we’ve got some tips and tricks to make it go a bit more smoothly. Here’s everything you need to know about how to Find the Sleeping Survivor in Enshrouded.
How to Travel Through The Shroud in Enshrouded

The first major challenge of Find the Sleeping Survivor is going to be navigating the shroud to reach them, but you won’t have to do quite as much shroud exploration as you might think. The Sleeping Survivor is located just to the west once you reach the north side of Braelyn Bridge.
You can spot that on your map, but to reach it you’ll have to take one of two paths. The first, and more difficult and nerve-wracking, option is to travel through the massive Enshrouded area beneath Braelyn Bridge. You can follow the path pretty directly north until you reach a cave which will take you up a level to a climbable wall that’ll get you on the other side of the bridge.
However, doing that brings the risk of getting lost in the shroud, running out of time while searching, and the enemies you’ll face while taking that path. A slightly easier option is to craft a Grappling Hook and take the high road. We’ve got more details here on all the materials you’ll need to craft one.
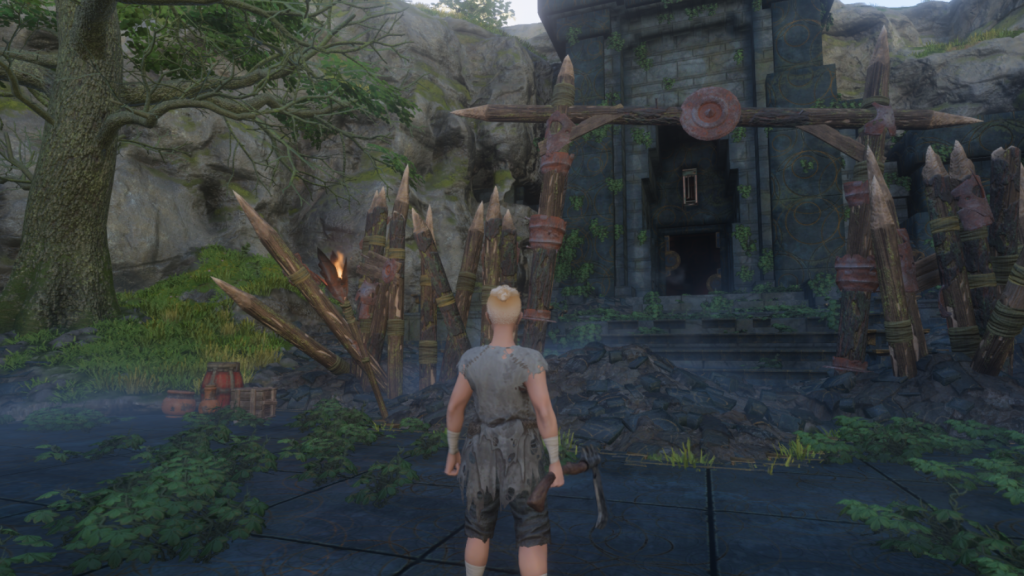
Once you have your trusty Grappling Hook, you can simply take the bridge itself and traverse to the other side without risking the shroud. Watch for an enemy who may attack on the bridge or if you take the shroud path, but alone he should be easily manageable. On the north side of the bridge, head due west and you’ll find a large set of ruins.
How to Awaken and Summon the Sleeping Survivor
To reach the Sleeping Survivor, you first need to defeat two enemies standing outside of these ruins. You’ll be prompted to try hiding in the bushes to look for an opening, and you can indeed get bonus attack damage when sneaking up and striking an opponent. It won’t be Assassin’s Creed levels of instant assassination, but it can help you take one of them out.
The second enemy is a bit closer to the ruins, and there is a way to simplify that kill if you’ve been able to craft and bow and gather or craft a few arrows. Look for a red jug next to where that enemy is kneeling, and shoot that explosive barrel with your bow to wipe him out.
Whether you’re using the hatchet that’s first acquired or a scrappy sword you’ve found, just be careful to block when they’re coming at you. Bandages and berries can heal over time and boost your health regeneration, but you really want to try not to let them deal significant damage and strike after blocking a few blows.
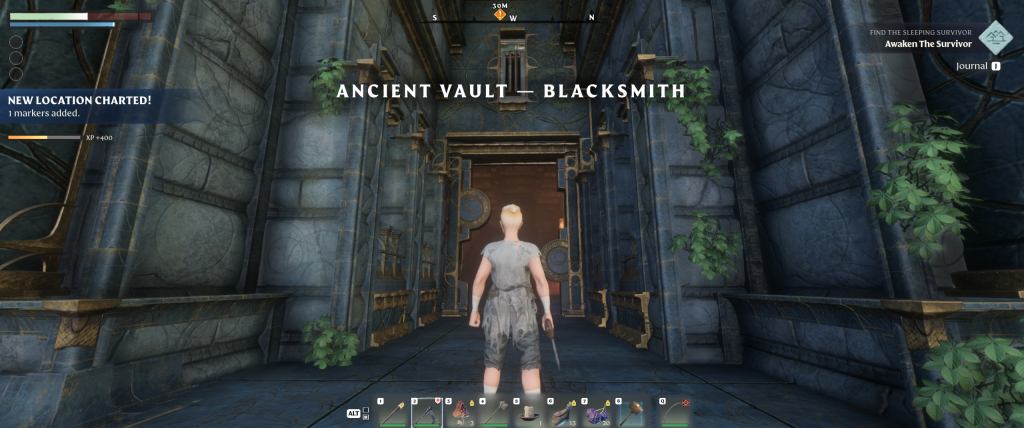
Once you’re inside, another enemy awaits that’ll require the same fighting strategies as the others. When he’s been dealt with, go to the pod and Awaken the Sleeping Survivor. To continue with him, you’ll need to return to camp and craft a Summoning Staff with some twigs before ideally spawning him somewhere near your Flame Altar and kicking off some new quests.
While most of the items back at the Ancient Vault – Blacksmith location can be gathered there, make sure to make use of the Anvil outside. Interacting with that Anvil will repair all the broken equipment in your inventory, and this is a great way to save on early resources rather than constantly crafting new tools.
You can place a Flame Altar to travel to it more easily, but make sure it’s far enough away that the Anvil and surrounding area isn’t within range, as it’ll despawn the area while the altar is placed. You can remove one and the Anvil will respawn again later.