We’ve said it before and we’ll say it again – Rocket League is a game of fine margins.
What…? ROCKET LEAGUE IS A GAME OF FINE MARGINS!
That means the smallest advantage or benefit you can find can massively improve the rate you score shots, save goals and, of course, win games.
There are several ways you can improve your game, from doing custom training drills focussed on core mechanics like defending and shooting or fine-tuning your camera settings to give you the best view of the field and control of your car.
(Picture: Psyonix)
One of the quickest and most impactful things you can do is to customize your controller settings from the button configuration to dead zones and sensitivity, there are so many things you can tweak that will improve your performance.
If you have never thought you need to it, then you are in luck because you are the type of player who is most likely to get the most out of this. Almost every Rocket League professional runs some sort of custom control configuration – some a slight tweak, others play with some truly ridiculous schemes but it goes without saying that everyone should be doing changing something to get the most out of their controller.
Now, this is a general guide, aimed at consoles (Xbox and PlayStation) AND PC gamers with no focus on a particular make or brand of controller. The thing to remember about controllers is they are a physical piece of hardware and some settings will feel great on one and crap on another. Take everything here as a guide and focus on what feels good for you.
Now let’s get into it.
Best controller settings for Rocket League
When it comes to sensitivity and deadzone settings much of this will come down to preference, but that doesn’t mean there aren’t some values you can use that will give you a good starting point.
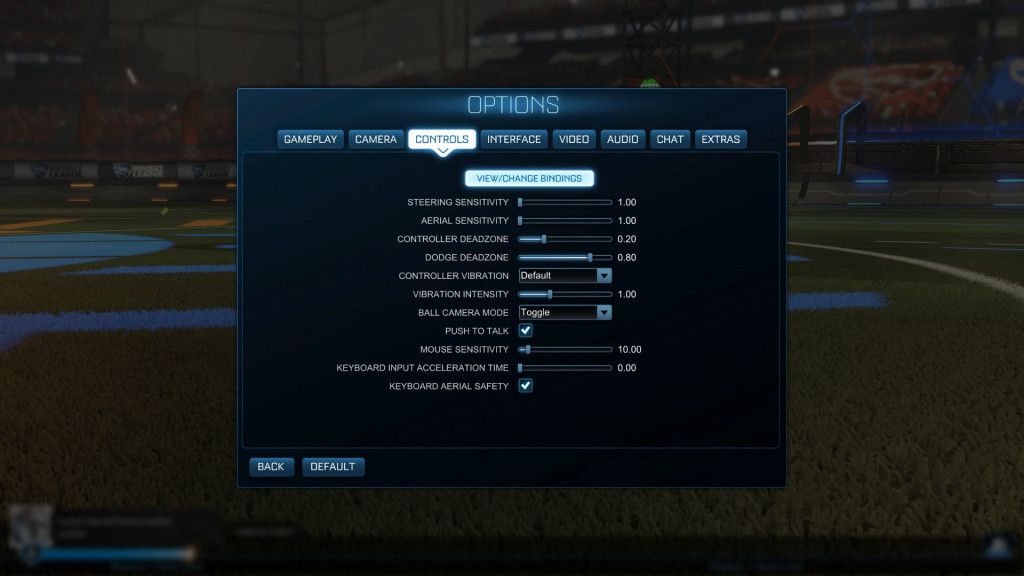
The default controller settings for Rocket League. (Picture: Psyonix)
The four settings that determine your controller settings and understanding what they are is important.
Steering Sensitivity: This determines how much moving the sticks will move your car, whilst on the ground (the higher the value, the more sensitive to your joystick movement it is, and the faster you can steer).
Recommend value: 1.5-2.00
Aerial Sensitivity: The same as Steering Sensitivity but for when your car is in the air. Most people have this 1:1 with Steering Sensitivity.
Recommended value: 1.5-2.00
Controller Deadzone: Deadzone refers to the amount you have to move the joystick before it registers movement, the lower the value the smaller the zone. The lower the better.
Recommended value: 0.10-0.15
Dodge Deadzone: Controls how far your joystick must move from centre to Dodge instead of Double Jump.
Recommded Value: 0.75-0.90
Now, remember these are simply guidelines. When it comes to deadzone it is very dependent on your controller, ideally, you want it as close to zero but some controllers will drift (move when you aren’t touching it).
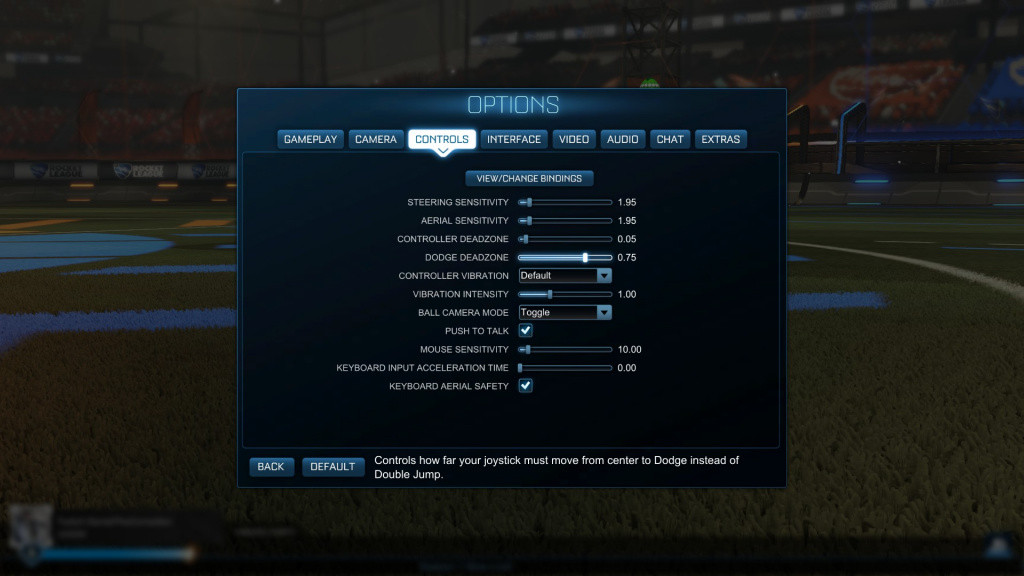
Aztral is one of the most mechanically gifted pro players. His settings are designed for maximum control. (Picture: Psyonix)
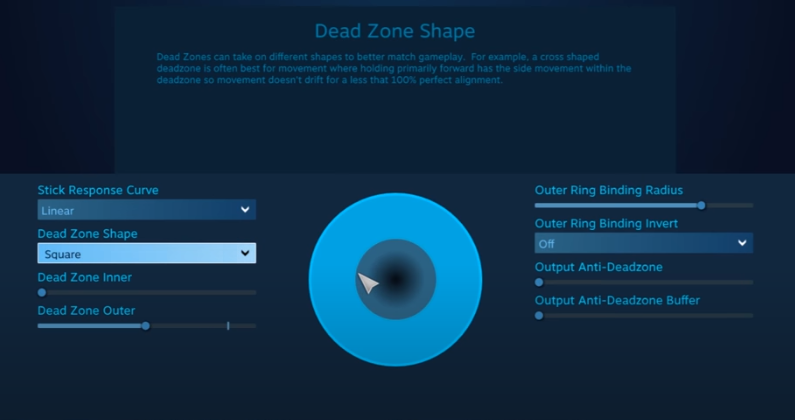
Advanced Deadzone settings
Now there is another setting you should look to change and that is your deadzone shape. Now this isn’t a value you can set within Steam’s “controller settings” menu.
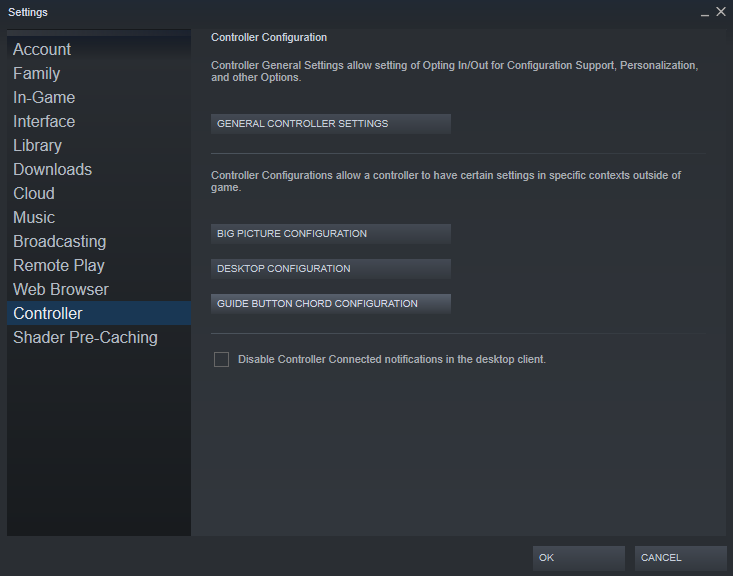
(Picture: Steam)
Click on the “Big Picture Controller” settings.
You will be greeted with this screen.
(Picture: Steam)
The vast majority of professional players use Cross. You want the Dead Zone Inner value set to “Zero” and the Outer value set as high as possible.
Button configuration
The best button configuration is probably the section of this article most up for debate as there is no accepted best in Rocket League, with a wide variety of button configurations used by pro players proving that there is no one “best”.
There are a few things to take into account when you are changing the controls from default though and these can inform what you decide to go with.
The two things you binds need you to be able to do are:
- Jump + boost + air-roll
- Jump + boost + powerslide
One of the best things you can do is move your boost from its default (circle or B) to a bumper button such as R1. This allows you to keep it pressed at all times.
Powerslide (default square or X) is also a good choice to move to your bumpers, the opposite side from your boost button feels natural so L1 is a good choice.
- Read more: Rocket League: Best defending training packs
The best thing to do with the button configuration is to experiment.
Checking out what your favourite pro uses also isn’t a bad idea.