
The Ashika Island is the most fast-paced map for both DMZ and Warzone game modes, sending players back to the Rebirth Island days or pure catastrophe. However, in today’s guide, we’re going to be slightly more stealthy in an attempt to locate and source the Town Center North Dead Drop within Ashika Island. Like other Dead Drops, players need to make an extreme effort in both stealth and caution. Ashika Island is small and gunshots will attract all sorts of unwanted attention, therefore stay low and follow the guide!
The specifics of the Ashika Island Town Center North Dead Drop are as follows: Sector E4, a small building west of the petrol station within that sector, west side of the building within a white garbage container. Although the Dead Drop locations should be expected to be quiet, the surrounding areas such as the gas station and general surroundings will contain enemies looking to hunt you!
Where Is The Ashika Island Town Center: North Dead Drop?
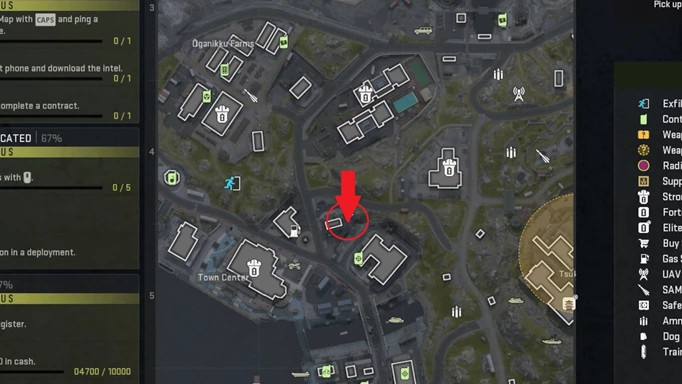
As seen within the image, the Dead Drop is located by a small cabin-type building. Don’t be fooled by its size, the location is relatively dangerous and has enemy AI lurking around. The Dead Drop is located behind several walls and completely out of the way of enemy view, therefore obtaining the drop shouldn’t be an incredibly difficult task.
However, reaching the location and extracting from the area will be the true challenge. To quickly obtain the drop it’s recommended that you are accompanied by a vehicle to quickly escape, but that will contradict the act of stealth. The key move here is simple: in and out. This will supply you with the highest chances of success and leave the DMZ raid alive and well. Additionally, the area is known to be less attractive to enemy players at the beginning of the match, therefore try and pick up the Dead Drop before enemy reinforcements arrive and begin to fill up the location. Good luck!