
With the new WoW Dragonflight expansion, players will have tons of new content to enjoy as they explore the Dragon Isles. Naturally, this includes new dungeons to explore, bosses, to defeat, and loot to plunder. One of these new dungeons is the Azure Vault, and if you’re curious to know how to defeat the bosses that lurk within, then we have you covered.
Below you can find a full breakdown of all the bosses inside the Azure Vault dungeon, how to defeat them, and of course, the loot you can gain when defeating them in WoW Dragonflight.
WoW Dragonflight The Azure Vault Dungeon Guide: All Bosses
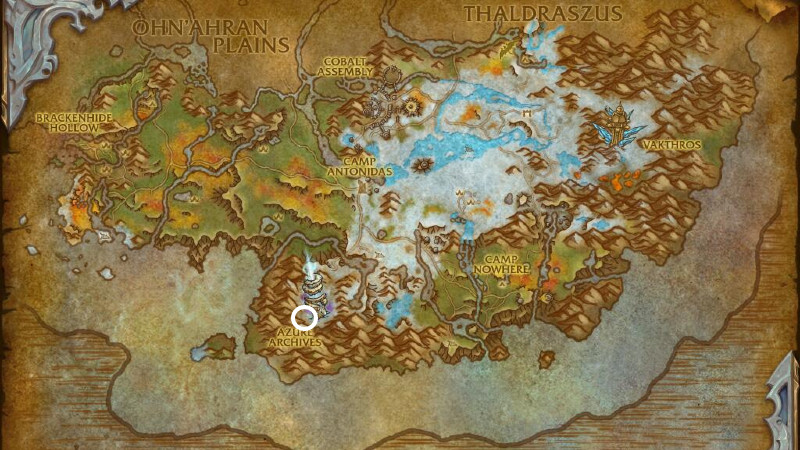
The Azure Vault is a Level 70 dungeon in the Dragon Isles’ newly introduced zone The Azure Span, just South of the Ohn’Ahran Plains. The Azure Archives is the closest flight point for both Alliance and Horde players. When you arrive, take a few steps down until you see the entrance to the dungeon.
Azure Vault contains four bosses, which are listed below in the order in which you will encounter them as you progress through the dungeon. We’ll also go over each boss’s move set, how to defeat them, and what loot you can expect to find after defeating them.
Azure Vault Dungeon Boss – Leymor
After entering the first main area in the dungeon, you will be faced with a lineup of mobs, ending with three Arcane Tenders being spawned. After defeating three of them, Leymor will spawn, and taking out this boss requires some teamwork.

Everyone is in charge of clearing Ley-Line Sprouts with Explosive Brand, so make sure you communicate about who goes where because the boss’s initial slam will push you back and reposition you. When the boss casts Consuming Stomp, use defensives at your disposal, and keep in mind that Because of Arcane Power, the more active sprouts there are, the more damage the boss will do.
The only Mythic Difficulty difference is that Volatile Sapling will spawn after clearing the Ley-Line Sprouts. They don’t deal much melee damage but be careful when they explode because Stinging Sap will deal massive damage to you.
Otherwise, just continue to avoid the boss’s attacks as described above and smack it with attacks in the interim until it falls.
Leymor – Loot
- Trinket – Burgeoning Seed
- Stat – AGI/STR
- Leather Waist – Cinch of Forgotten Duty
- Stat – Crit/Haste
- Cloth Wrist – Infused Elemental Bands
- Stat – Crit/Vers
- Polearm – Ley-Line Tracer
- Stat – Str, Haste/Mastery
- Mail Shoulder – Spaulders of Wild Growth
- Stat – Crit/Mastery
- Ring – Unstable Arcane Loop
- Stat – Haste/Crit
Azure Vault Dungeon Boss – Azureblade
Then we can proceed to the Azureblade boss. The boss has two phases that he alternates between throughout the fight, the first being the Summon Draconic Image and Ancient Orb combo, and the second being the Overwhelming Energy paired with Draconic Illusion. Keep in mind that you will not be able to damage the boss until you defeat the four Draconic Illusions, after which they will stop casting the Seal Empowerment, causing the first phase to repeat.

The boss will cast Summon Draconic Image, so immediately focus on the Draconic Image while interrupting its Illusionary Bolt cast. When defeating the Draconic Image on Mythic difficulty, it will cause Unstable Magic, so be sure to avoid it.
Next, you’ll want to avoid the Ancient Orb casting and sidestep any Ancient Orb Fragments that come your way during the Overwhelming Energy attack. During the second phase of the encounter, fully focus on the Draconic Illusion and secure your footing during battle, and don’t get overwhelmed.
When defeating the Draconic Illusion on Mythic difficulty, the Unstable Magic ground animation will be triggered; so do your best to avoid it. Overall, you’ll want to keep moving during this fight and attack with ranged skills, avoiding the onslaught of attacks from Azureblade and only countering up close when the boss is in cooldown or distracted.
This Boss fight requires balancing the boss itself and the Draconic Images, so be sure to wipe them out first while voiding as many attacks as possible. Then move in to attack the boss who isn’t as tough without its summoned help.
Azureblade – Loot
- Back – Cloak of Lost Devotion
- Stat – Crit/Haste
- 1-H Axe – Horizon Splitter
- Stat – Agi, Vers/Haste
- Trinket – Tome of Unstable Power
- Stat – Int
- Plate Feet – Twenty-Two-League Striders
- Stat – Crit/Vers
- 1-H Sword – Tz’onna, Fear-Striker
- Stat – Int, Haste/Vers
Azure Vault Dungeon Boss – Telash Greywing
Telash Greywing is a little more difficult to take down because he has an extra “intermission” phase called Absolute Zero that is used when he reaches 100 Energy. During this phase, he will use Glacial Shield to protect himself and spawn a Vault Rune.
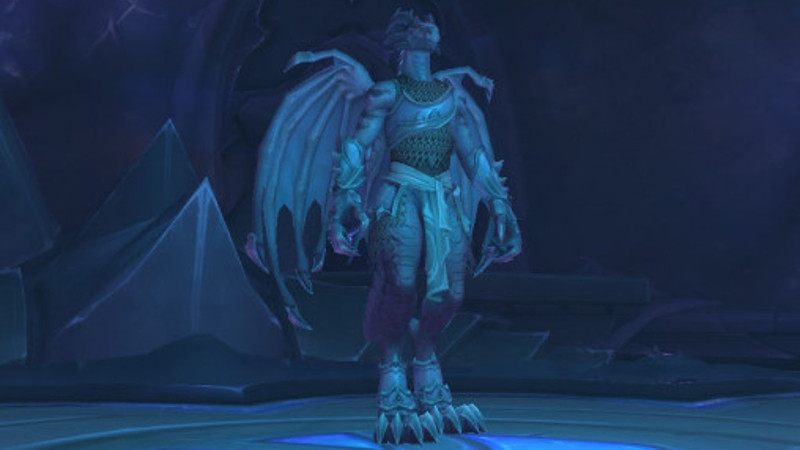
To survive, you must remain under the Vault Rune until the end of the Absolute Zero cast. Failure to do so will almost certainly result in death (unless you have immunity or the defense to survive). Furthermore, after protecting players from Absolute Zero on Mythic difficulty, the Vault Rune becomes inactive.
The boss will have 60 Energy at the start of the fight and will restart at 0 after each Absolute Zero Icon Absolute Zero intermission. If he starts at 0, it takes him about 50 seconds to enter his intermission.
Moving onto the fight itself, the boss will cast Frost Bomb on everyone in your party regularly, followed by Frozen Ground when it expires. To avoid additional damage, make sure you don’t overlap each other and spread out evenly.
Due to Frozen Ground, it is also critical to place the bombs close to each other for better space management. Telash Greywing will cast Icy Devastator on a random member of your party throughout the fight, but you can use defenses or immunities to negate this.
Remember that abilities that reset combat, such as the Night Elf Shadowmeld racial, Rogue’s Vanish, Hunter’s Feign Death, Mage’s Invisibility, and others, can completely negate this boss mechanic. So just be wary of the Absolute Zero cast and the positioning of your team to keep damage coming from your range players, keeping the tank players moving as they deliver damage.
Telash Greywing – Loot
- Cloth Hands – Azureblade’s Work Gloves
- Stat – Haste/Mastery
- Neck – Custodian’s Medallion of Delusion
- Stat – Vers/Mastery
- Staff – Golden-Winged Rod
- Stat – Agi, Mastery/Vers
- Plate Waist – Illusion Breaker’s Waistguard
- Stat – Mastery/Crit
- Leather Wrist – Mirage Bindings
- Stat – Mastery/Haste
Azure Vault Dungeon Boss – Umbrelskul
After defeating Telash Greywing, use any nearby Book of Translocation (or manually drop down) to reach the dungeon’s final boss, Umbrelskul. The boss has three brief intermissions where he will become Brittle at 75%, 50%, and 25% health.
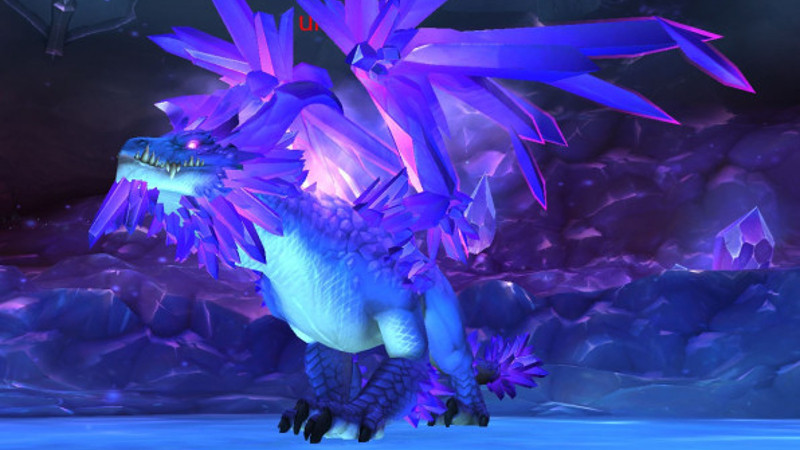
Oppressive Miasma, a Mythic-exclusive additional mechanic, will be present throughout the fight; the more you move, the slower you will become. Because it is a Curse effect, it can be removed using any curse dispel or magical immunity spell.
When the boss enters the Brittle intermission, focus on destroying the Detonating Crystals that spawn immediately. This is the most important part of the fight, as failing to do so will result in a group-wide damage-over-time effect called Fracture.
Furthermore, on Mythic difficulty, the boss will mark one of the Detonating Crystals as a Hardened Crystal, which has the same effect as a regular crystal but has a Crystallize absorb barrier that you must first break.
Next, you should stay away from the Crystalline Roar at all costs, as it inflicts 50 Arcane damage to all players in a line in front of the caster. And you should also avoid the Arcane Eruption cast’s ground effect, as it will leave a lingering Crackling Vortex effect on you if you stand in it that deals 18 Arcane damage every 1 second.
So be sure to focus on those Detonating Crystals before anything else, as after they’re destroyed, the boss becomes a lot easier to deal with.
Umbrelskul – Loot
- Shield – Crystalized Bulwark
- Stat – Haste/Vers
- Plate Chest – Cuirass of Irreparable Madness
- Stat – Haste/Mastery
- Cloth Head – Headwrap of the Abandoned
- Stat – Crit/Vers
- Leather Shoulder – Mantle of Yearned Freedom
- Stat – Crit/Mastery
- 1-H Sword – Refraction’s Edge
- Stat – Agi, Vers/Crit
- Mail Legs – Stasis-Freed Leggings
- Stat – Haste/Crit
- Trinket – Umbrelskul’s Fractured Heart
- Stat – Int