The epic journey you embark on when playing DIablo Immortal will have you slaying monsters, defeating fellow warriors, and, importantly, battling your way through dungeons. One such dungeon is the mysterious Forgotten Tower.
If you find yourself unsure how to conquer it, we have you covered. This guide will explain how to clear the Forgotten Tower dungeon, from pinpointing its location to the level requirements to beat it, Set Items, and other rewards you gain once you have completed it.
Diablo Immortal – Forgotten Tower Location and Required Level
To find the Forgotten Tower location in Diablo Immortal, you will first need to complete the Level 20-28 zone story, Dark Wood. The Forgotten Tower will be located in the Dark Wood, just before the area where it transitioned into the Shassar Sea. After doing so, you will encounter the dungeon’s main boss, The Countess.
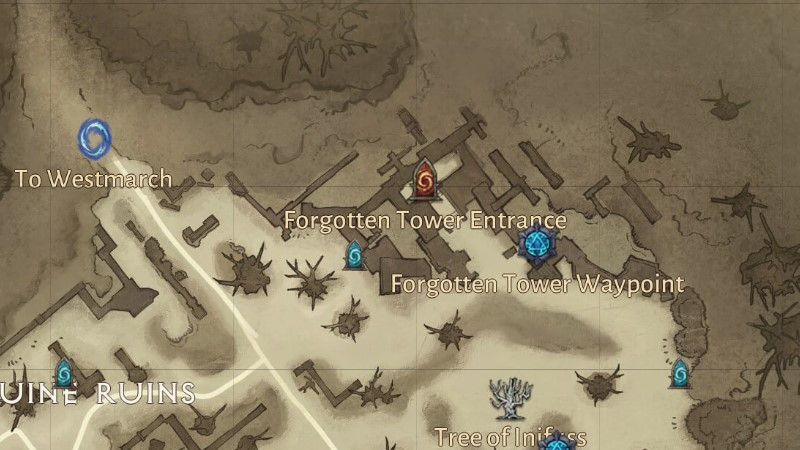
To gain access to the Forgotten Tower, players must be at least Level 20. While it is recommended that the party size for this dungeon is four players, it is possible to solo it if you play cautiously and follow the tips we provide below.
Diablo Immortal – Forgotten Tower Bosses
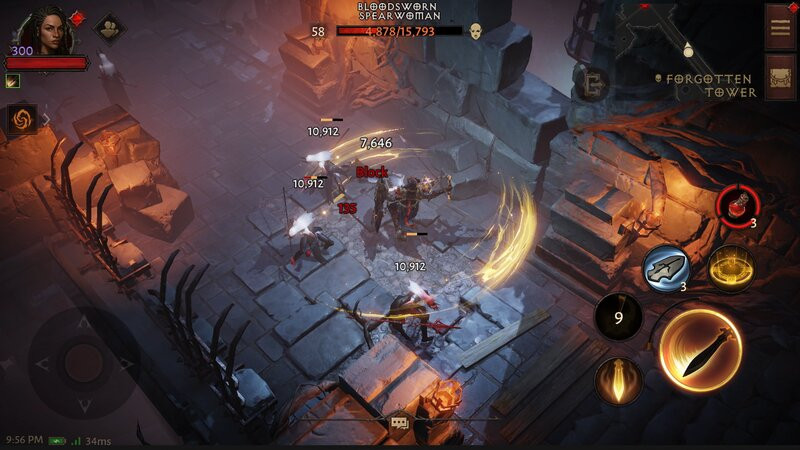
Once you enter the dungeon, there will be a large group of enemy mobs you must battle before taking on the first boss. These mobs will comprise Dark Creepers, Quill Rats, Direwolf, Corrupted Mauler, Bloodsworn Spearwoman, Bloodsworn Oppresso, and Hungry Torso.
- Diablo Immortal Paragon – All Trees And Unlock Levels
- Diablo Immortal Elder Rifts – How to unlock, complete, and earn rewards
- Diablo Immortal Boon of Plenty – How to get, price, and rewards
- All Diablo Immortal Zone Events and Rewards
Defeating them is relatively simple. Using ranged and AOE (Area of Effect) attacks will wipe most of them out easily, granting you some bonus XP and items as you go. After taking care of the enemies, you will encounter the Shaman and the Blood Clan. You can kill these mobs the same way.
Tip: We recommend clearing the room of all enemy mobs before proceeding to battle the boss.
Priestess Innaloth
Priestess Innaloth is the first boss you’ll encounter before battling the final boss. Her group of enemies will act as her line of defense and offense as she attacks you primarily from behind.
It would be best to eliminate the enemies first while dealing some damage to her with AOE attacks until she’s alone, and then finish her off. It’s not a difficult fight, but you can be caught off guard by the volume of enemies you will fight, so be wary.
Next, you will encounter the Bloodsworn Army Fight, which involves killing 100 enemies in an 80-second timed event. At the end of it all, you’ll gain five bonus chests as a reward. Taking them out as they spawn is the best strategy and staying away from the swinging blade when it appears is vital to surviving this fight. Once you’ve completed this challenge, you can finally move on to The Countess.
The Countess
The Countess is a more challenging fight than any of the challenges in this dungeon, as she can deal quite a large amount of damage. She will first appear in the middle of the chamber and swing her sword at you. Followingly, you’ll want to move in closer to her, strafing around her to land some attacks (while avoiding the sword strikes, of course).
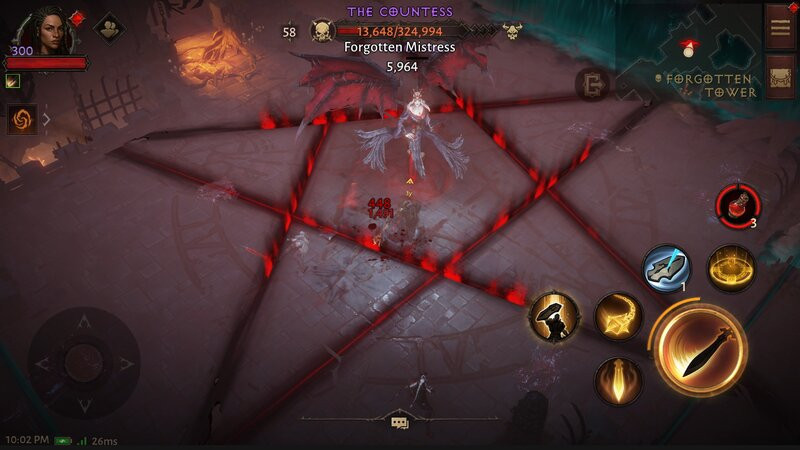
She will also alternate by using a large AOE attack, signaled by a red circle on the floor; when this happens, move away from her quickly and wait it out before moving back in to attack and avoid the sword strikes. Do this until you wear down the first portion of her health, and she switches to her usual pattern of attacks.
She will then summon nine Bloodsworn enemies, which you need to kill as quickly as possible to avoid being overwhelmed. Importantly, ensure that you avoid The Countess during this time, as she will initiate AOE attacks as soon as you get close.
She will also place a red diagram made of lines on the ground that, if touched, will deal massive damage to you. These lines won’t disappear until she dies, so avoid them at all costs and deal damage to her when it’s safe to do so.

The Countess’ second phase involves all the previous attacks and an attack where she jumps into the air and slams down onto the ground. When she does this, she will summon a swarm of blood bats. This combo can be lethal, so move away from her and avoid the red line while taking out the bats one at a time.
From there, find openings to attack and move away when she makes her AOE attacks, and keep doing this until you can drain her health and she dies. Once dead, the bonus treasure chests will spawn in the center of the room, and some of the Set Items listed below will drop by chance.
Diablo Immortal – Forgotten Tower Set Items
After The Countess is defeated, you will have a chance to gain some Set Items from the dungeon as a reward. These can drop by chance depending on the level and Hell difficulty you’re playing on, so while it’s not a guarantee, here are the items you could get at the end of your battle in the Forgotten Tower.
-
Wisdom’s Edge Amulet (Hell II +)
-
The Prisoner Ring (Hell IV +)
-
Shepherd and Father Ring (Hell IV +)
-
Issatar’s Open Hand (Hell II +)
-
Storm-Tack of Shal’baas Belt (Hell I +)
-
Mountebank’s Slyness Boots (Hell I +)
And that concludes our guide on the Forgotten Tower in Diablo Immortal.
For more on the game, check out our section dedicated to Diablo Immortal guides, news, leaks, and much more.
Featured image courtesy of Blizzard Entertainment.